10 Chicken Coop Roost Ideas for Healthier, Happier Birds
When I built my first coop, I thought any old stick or board would do for a chicken roost.
Spoiler: it didn’t.
My hens were restless, feathers ruffled, and mornings started with way too much drama. That’s when I discovered that the type, shape, and setup of a roost matter more than most people realize. To save you the trial-and-error, I’ve put together 10 of the best roosting ideas that actually work. So check them out!
Chicken Coop Roost Ideas
1. Simple 3-Tier Ladder Roost
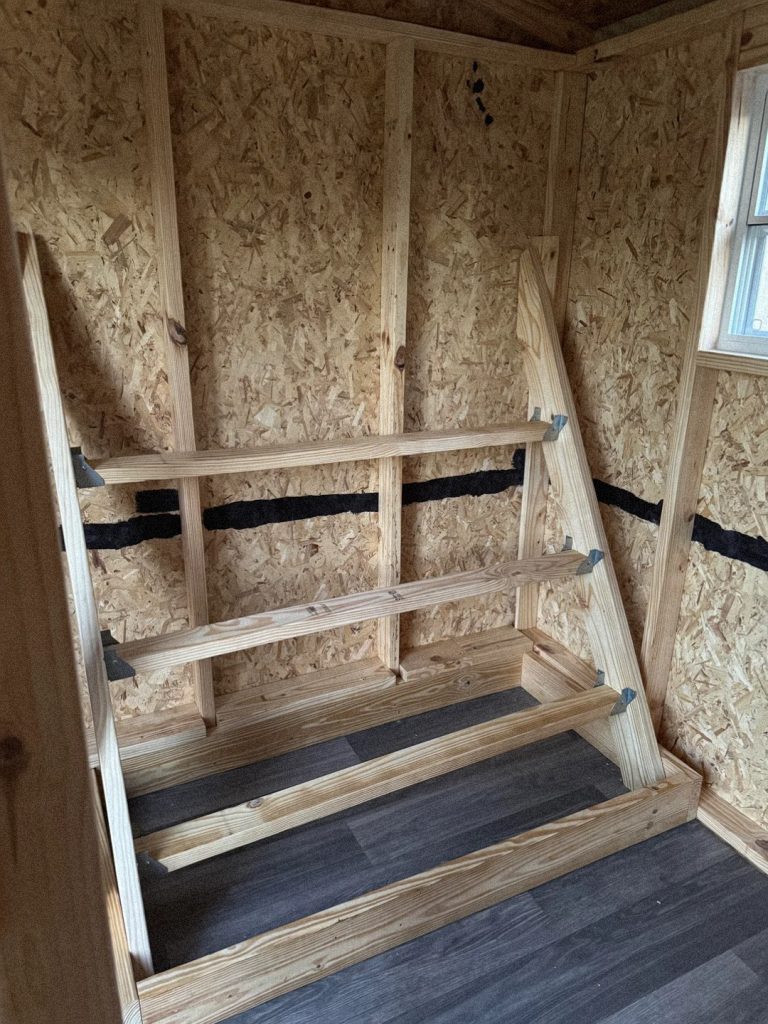
Image: https://www.reddit.com/user/M_garcia22/
What Makes It Unique
This roost design is perfect for beginners or anyone looking for a simple, yet effective solution for a smaller coop. The ladder-style tiers allow multiple chickens to perch comfortably without taking up too much floor space. It’s a great way to maximize vertical space and give your flock more room to move around, which is especially beneficial in coops with limited square footage.
Materials Needed
- 2×4 lumber
- Wood screws
- L-brackets
How to Do It
- Build the Base and Sides: Create a rectangular base frame using 2x4s. Then, attach two long 2x4s to the sides of the base, angling them slightly to support the roosting bars. The angle should allow for a gentle incline, like a ladder.
- Add Roosting Bars: Cut 2x4s to the desired length for the roosting bars. The number of bars will depend on the size of your coop and how many tiers you want. In this design, there are three bars.
- Attach Roosting Bars: Secure the roosting bars horizontally between the two angled side pieces. You can use wood screws for a strong hold. For extra stability, use L-brackets where the roosting bars meet the side supports. Make sure the bars are spaced far enough apart that the chickens won’t poop on the birds on the tier below.
- Install in the Coop: Place the finished roost against a wall in your chicken coop. Ensure it’s level and stable before letting your chickens use it.
2. The Two-Level Bench Roost
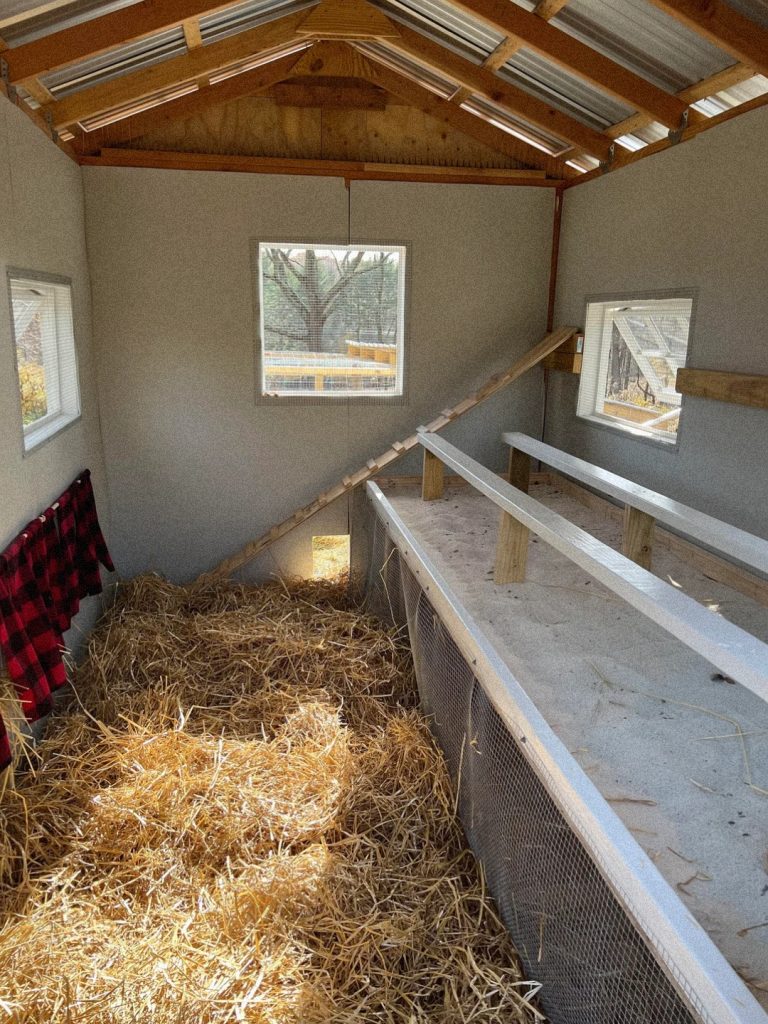
Image: https://www.reddit.com/user/seashoes/
What Makes It Unique
Here, we got a roosting area with a designated dust bathing or ground space, making it a very functional and versatile option. The elevated bench-style roost provides a comfortable and secure place for chickens to sleep, while the lower, enclosed area below the roosting bars is perfect for their natural dust bathing instinct. This setup keeps the dust bath area contained and separate from the main bedding, contributing to a cleaner and more organized coop.
Materials Needed
- 2×4 lumber
- Wood screws
- Hardware cloth
- Paint (optional)
How to Do It
- Construct the Frames: Build two rectangular frames using 2x4s for the roosting benches. The size should be proportional to your coop. These will serve as the base for each roosting area.
- Add Legs: Attach legs to each corner of the frames to elevate them off the ground. The height should be high enough to allow chickens to comfortably walk and dust bathe underneath.
- Create the Roosting Bars: For each bench, attach one or two long 2x4s horizontally across the top of the frames. These will be the roosting bars where the chickens perch.
- Install the Dust Bath Enclosure: Secure hardware cloth along the front of the roosting benches, from the top of the bench frame to the floor. This creates an enclosed space below the roosting bars. You can then fill this area with sand or dry dirt for a dedicated dust bath.
- Finish and Install: Paint or seal the wood to protect it from moisture and chicken droppings, then place the finished benches in the coop. The ramp shown in the image can be added to help chickens easily access the roosts.
3. Natural Branch Roosts
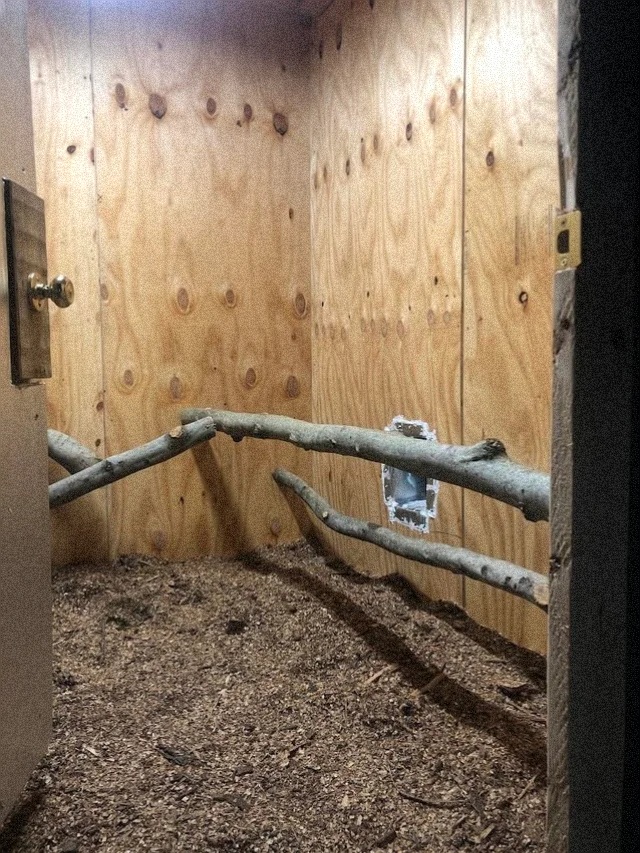
Image: https://www.reddit.com/user/fredrickdgl/
What Makes It Unique
Wanna go rustic? Try this one. It offers a rustic, organic feel that closely mimics a chicken’s natural environment. Using real tree branches provides roosting bars of varying diameters, which is excellent for a chicken’s foot health. The irregular shape of the branches allows them to exercise their toes and grip naturally, helping to prevent foot issues like bumblefoot. This is a very simple and cost-effective solution that looks great and is highly functional.
Materials Needed
- Tree branches
- Wood screws
- L-brackets
How to Do It
- Select and Prepare Branches: Find sturdy tree branches that are free of any harmful chemicals or treatments. The branches should have a diameter that is comfortable for a chicken to grip. About 2 inches is a good starting point. Use branches that are a bit thicker in some spots to provide variety.
- Cut to Size: Cut the branches to the desired length to fit the width of your coop. You can use one long branch or several smaller ones to create a multi-level or staggered roost.
- Secure to the Walls: Attach the branches to the walls of the coop using long wood screws. For added stability, especially with heavier branches, use L-brackets on the underside of the branches to provide extra support. Ensure the branches are firmly in place so they don’t spin or fall when the chickens are on them.
- Position and Space: Position the roosting bars at a height that is comfortable for your chickens to jump onto. If you are installing multiple branches, stagger them so that the chickens on a higher branch won’t be directly over the ones below them, which helps keep the lower roosting bars clean.
4. Elevated Roost with Integrated Nesting Boxes
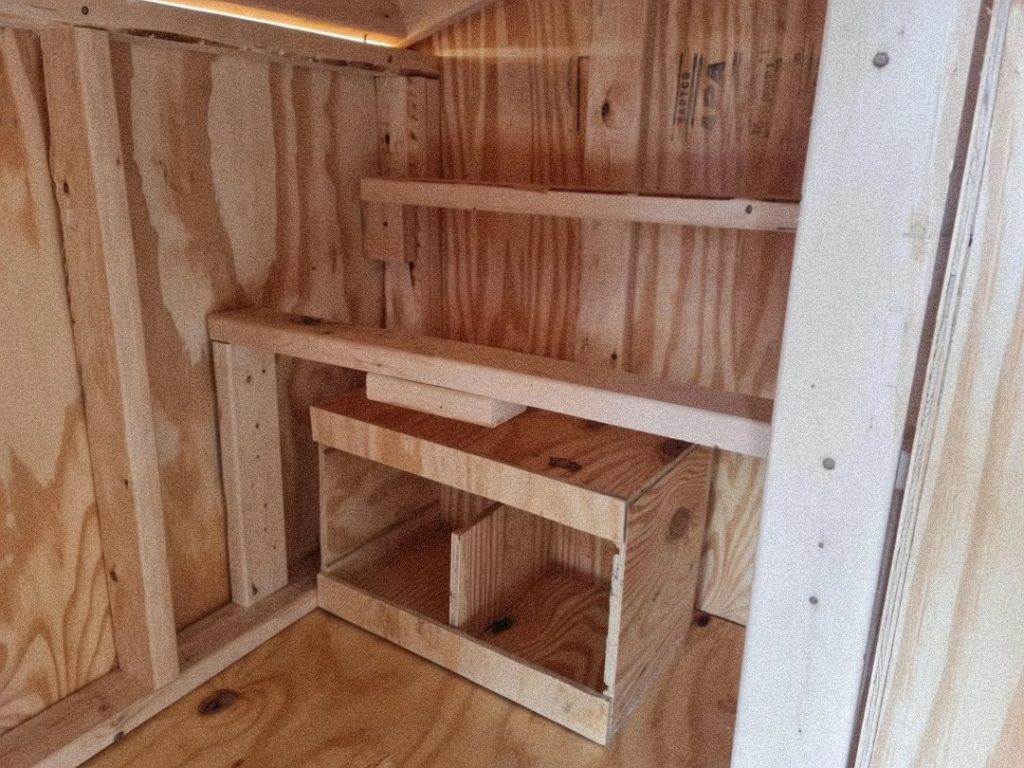
Image: https://www.reddit.com/user/rhurlow/
What Makes It Unique
This smart, space-saving design combines two essential chicken coop features into one compact unit: roosting bars and nesting boxes. By building roosting bars directly above a set of nesting boxes, you maximize vertical space and create a highly efficient layout. This setup is ideal for smaller coops with 6-8 hens where every inch counts. It provides a secure, elevated place for chickens to sleep while keeping their nesting area easily accessible and off the main coop floor.
Materials Needed
- Plywood
- 2×4 lumber
- Wood screws
- Saw
How to Do It
- Build the Nesting Box Frame: Start by constructing the nesting boxes using plywood. Create a box with a divider in the middle to form two separate nesting areas. The dimensions will depend on the size of your flock, but each box should be large enough for one hen to comfortably sit in.
- Attach the Roosting Bars: Above the nesting box unit, install a roosting bar using a 2×4. You can attach it directly to the wall and to the top of the nesting box structure, ensuring it is sturdy and level.
- Add a Second Roosting Level: For extra roosting space, you can add a second, higher roosting bar. Secure a short section of 2×4 to the wall to create a support bracket and then attach a horizontal roosting bar to it, parallel to the first bar.
- Install the Unit: Place the entire structure against a wall in your coop. Make sure it is securely fastened to the wall to prevent it from tipping over. This combined unit provides both a perfect sleeping spot and a private place for hens to lay their eggs.
5. Stylish Corner Roost With Integrated Nesting Boxes
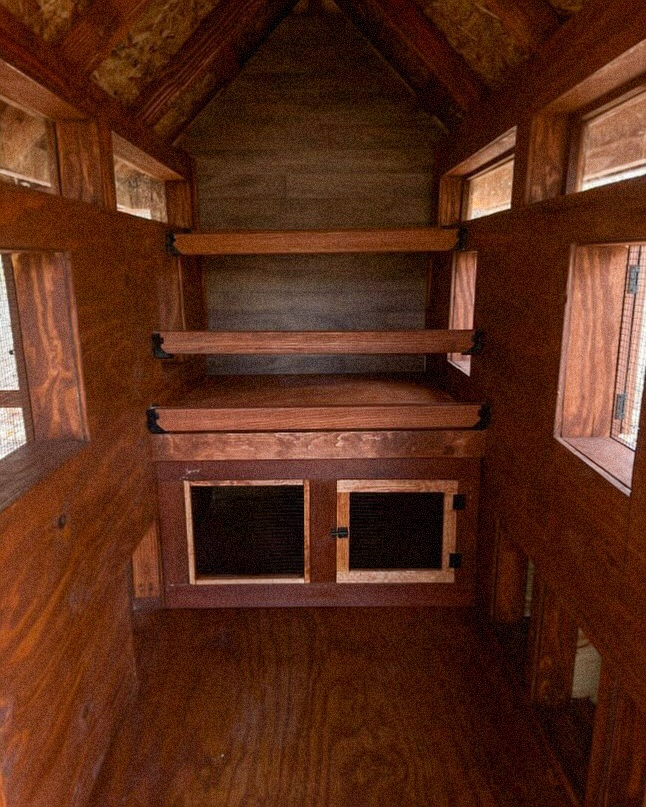
Image: https://www.instagram.com/bee.jeweled.coop/
What Makes It Unique
This functional design maximizes a corner space within the coop. It features tiered roosting bars and, in some variations, integrates nesting boxes below. The use of smooth, finished wood and sleek hardware gives it a very clean and professional look. The tiered design allows multiple birds to roost without a “pecking order” issue, and the enclosed space below can be used for nesting boxes or a secure broody area.
Materials Needed
- Plywood
- 2×4 lumber
- Wood stain
- Hinges
- Latches
How to Do It
- Build the Base and Nesting Boxes: Construct a sturdy base unit for the nesting boxes from plywood. If you wish to make the nesting boxes accessible from outside, create two doors on the front and attach them with hinges and latches.
- Add the First Roosting Bar: Above the nesting box unit, install the first roosting bar. Secure it firmly to the back wall and the sides of the coop.
- Create the Tiered Levels: Build a second, slightly higher tier above the first roosting bar. The key is to stagger the roosting bars so that chickens on the top bar are not directly over the birds on the lower bar. Use angled supports or brackets to attach the second roosting bar to the back wall.
- Finish and Install: Before installing, you can stain or seal the wood to protect it and give it a polished appearance. Place the entire structure in a corner of your coop and ensure it is stable and secure.
6. Aesthetically Pleasing Staggered Roosts
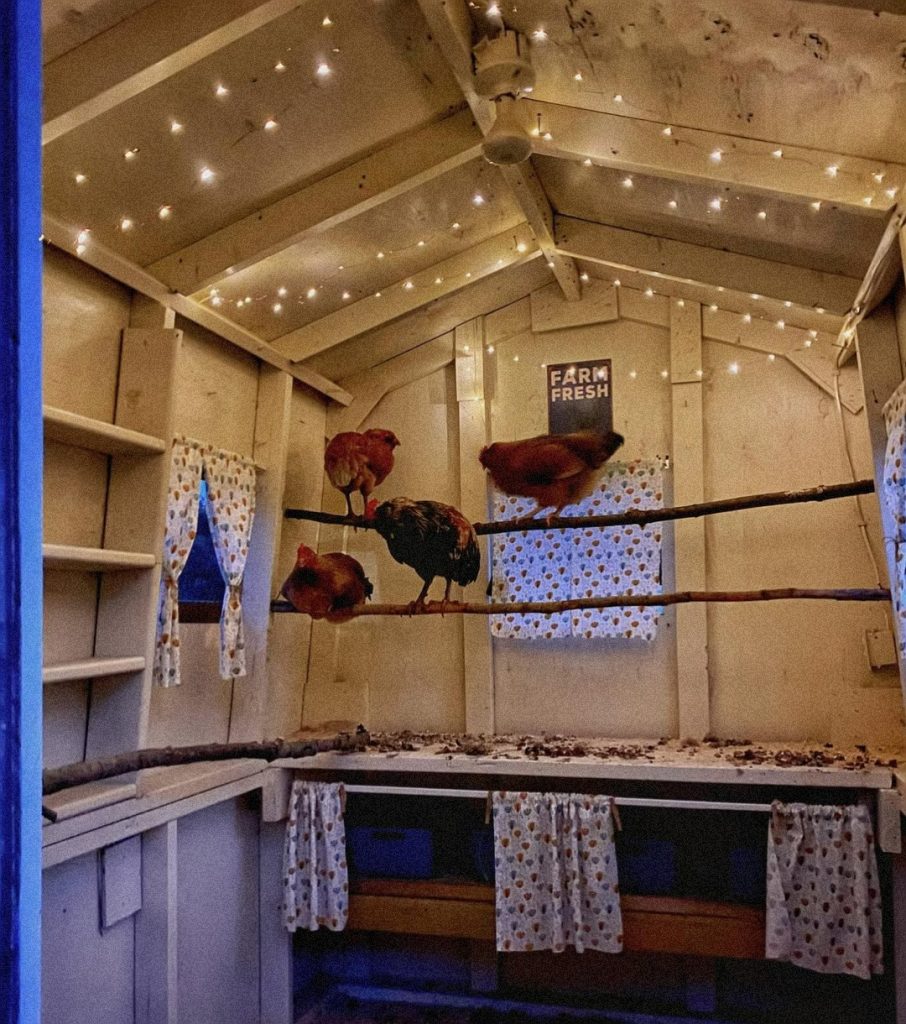
Image: https://www.instagram.com/happy_hooves_farm/
What Makes It Unique
Now, how about combining function with style? The staggered roosting bars are made from natural tree branches, providing a comfortable and foot-healthy surface for your chickens. The unique placement of the bars at different heights and angles allows for a more natural roosting hierarchy. The design also incorporates whimsical elements like decorative lighting and curtains, creating a beautiful and inviting space for your flock. This roost demonstrates that a chicken coop can be both practical and charming.
Materials Needed
- Tree branches
- Wood screws
- Brackets
- Curtain rod
- Curtains
How to Do It
- Select and Prepare Branches: Choose sturdy branches with a diameter comfortable for a chicken’s feet. Clean them thoroughly and ensure they are free of pests.
- Position the First Roost: Secure the lowest branch to the back wall of the coop at a comfortable height for your chickens to jump onto. Use wood screws and brackets to ensure it is very stable.
- Create the Staggered Roosting System: Attach the remaining branches at different heights, angles, and distances from the walls. This creates a natural, multi-level roosting area. It’s best to avoid placing them directly above one another to prevent droppings from falling on the birds below.
- Add Decorative Elements: Once the roosts are securely in place, you can add personal touches. Hang curtains on the windows to provide privacy and block drafts, and install decorative lighting to create a cozy atmosphere.
7. Multi-Tier Roosting System
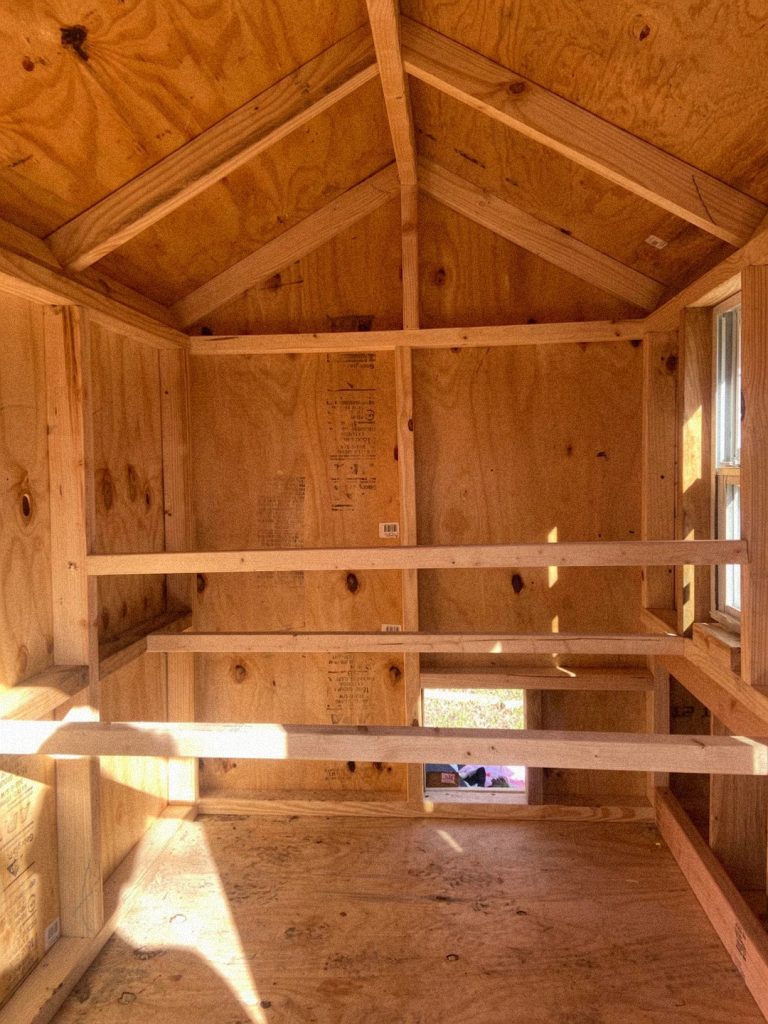
Image: https://www.reddit.com/user/JuiceRuth/
What Makes It Unique
This one is all about maximizing space and providing ample roosting room for a large flock. The multi-tier roosting system uses a series of elevated bars, all at the same height, running parallel to the back wall. This allows for a significant number of chickens to roost side-by-side, which is great for coops with a wide footprint. The design also includes a lower roosting bar, giving the birds a choice of where to sleep and helping to accommodate the natural pecking order.
Materials Needed
- 2×4 lumber
- Wood screws
- Saw
How to Do It
- Install the Support Brackets: Attach vertical support pieces to the back wall of the coop at the desired height. These will serve as the anchors for your roosting bars. You can also add support brackets on the side walls for extra stability.
- Attach the Roosting Bars: Cut 2x4s to the length of your coop. Securely attach the first roosting bar to the support brackets. It should be parallel to the back wall.
- Create Additional Tiers: For a multi-tier system, measure and cut additional roosting bars. Install them parallel to the first bar, ensuring there is enough space between them for the chickens to comfortably jump up and for droppings to fall to the floor below.
- Add a Lower Roost: To provide more options, install a lower roosting bar closer to the front of the coop. This will give chickens a range of choices and is particularly useful for older or less mobile birds.
- Secure All Roosts: Go back and check that all roosting bars are firmly screwed into their supports to ensure they are stable and safe for your flock.
8. Ladder Roost
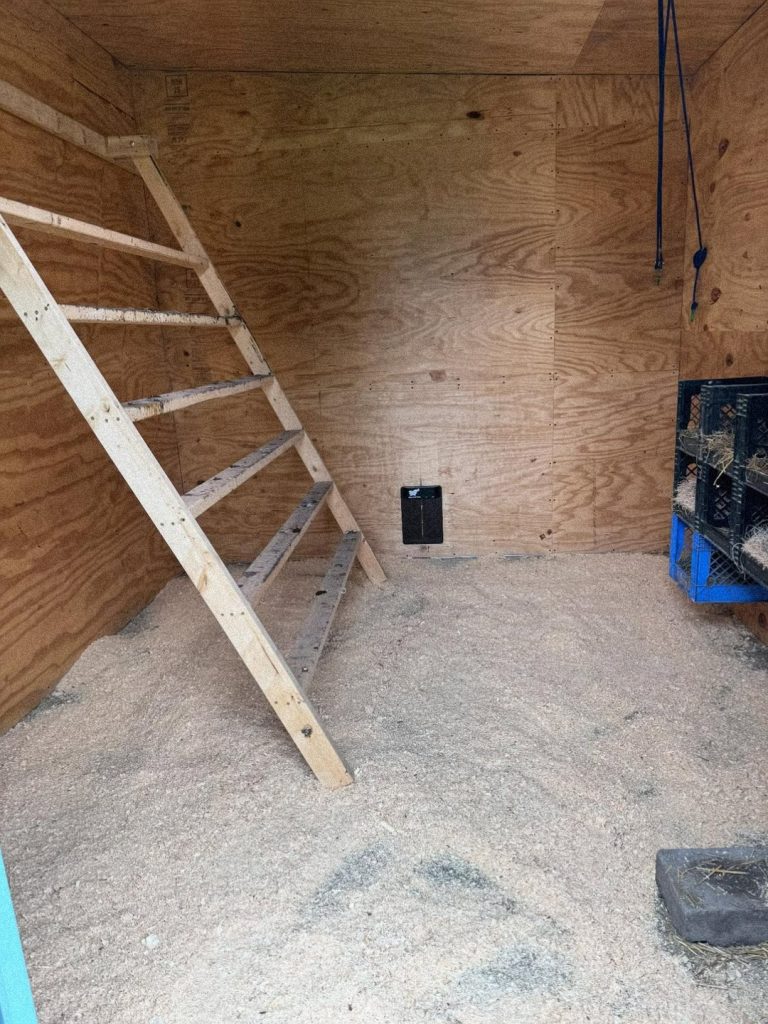
Image: https://www.instagram.com/erica_larson_/
What Makes It Unique
This is a straightforward and highly effective design that provides plenty of vertical roosting space without taking up a large footprint on the coop floor. The ladder roost is a simple series of ascending rungs that allows chickens to climb to different levels. This design is particularly beneficial for accommodating a larger flock in a smaller coop, as it leverages the height of the space. The angled design also gives chickens a clear path to their preferred roosting spot, helping to minimize conflicts.
Materials Needed
- 2×4 lumber
- Wood screws
- L-brackets
How to Do It
- Build the Side Supports: Use 2×4 lumber to create two long, angled side supports. These pieces should be cut at the top and bottom to sit flush against the coop walls and floor. The length and angle will determine the height and slope of your ladder.
- Attach the Roosting Rungs: Cut several 2x4s to the desired width for the roosting rungs. The rungs should be spaced out so that chickens have enough room to perch comfortably and so that droppings fall to the floor without contaminating the rungs below.
- Secure the Rungs: Attach the rungs horizontally between the two angled side supports. Use a level to ensure each rung is flat. Securely fasten them with wood screws for stability. For added strength, you can use L-brackets at each connection point.
- Install the Ladder: Place the finished ladder against the wall of the coop and anchor it to the wall studs to prevent it from moving or tipping over.
9. Elevated Brooder Roost System
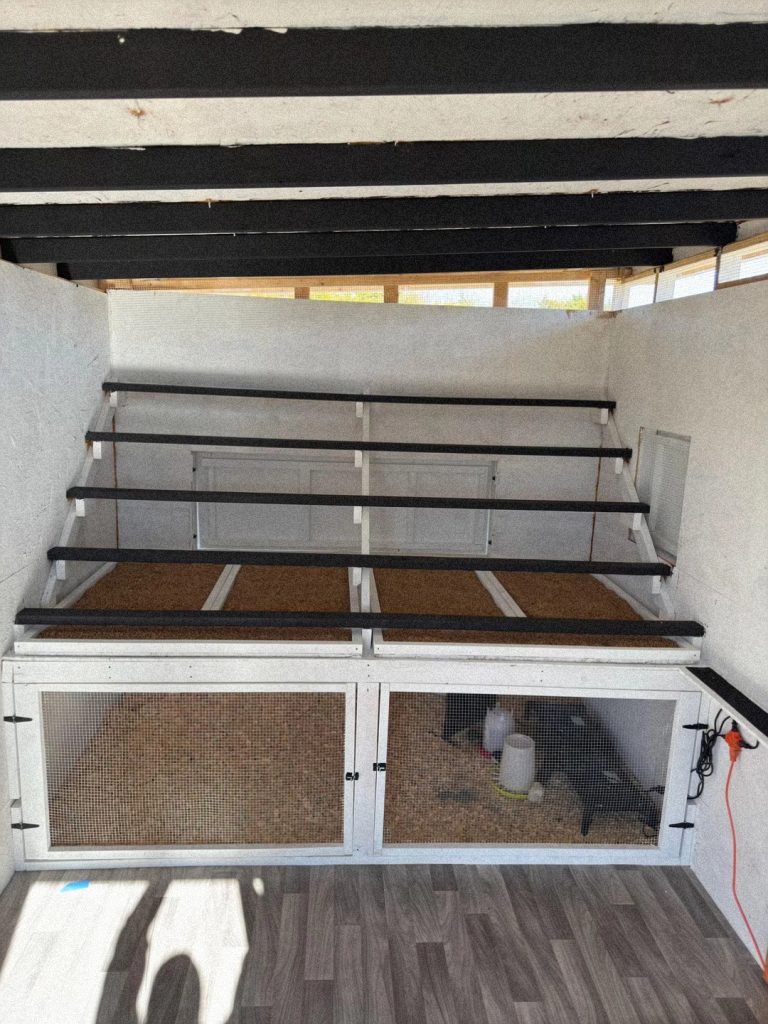
Image: https://www.reddit.com/user/anoiidd/
What Makes It Unique
This is a highly innovative and practical design that combines a roosting area for adult chickens with an integrated and elevated brooder space for chicks. The upper tiers feature several roosting bars, providing a perfect sleeping area for the flock. Below, a secure, enclosed space with doors serves as a brooder or a separate enclosure for a broody hen. This multi-purpose structure makes efficient use of vertical space and provides a safe and clean environment for both adult birds and young chicks.
Materials Needed
- Plywood
- 2×4 lumber
- Wood screws
- Hardware cloth
- Hinges
- Latches
How to Do It
- Construct the Brooder Box: Build a large, rectangular frame using plywood and 2x4s. This will serve as the base and walls for the brooder box. Cut a divider in the middle to create two separate compartments if desired.
- Create the Front Doors: Cut two openings on the front of the brooder box and frame them. Cover the openings with hardware cloth for ventilation. Attach doors with hinges and latches to make it easy to access the chicks inside.
- Add the Elevated Roosting Bars: Above the brooder box, install a series of roosting bars. You can use 2x4s for the roosting bars, angled upward from the front of the brooder box to the back wall of the coop. This creates a multi-tiered system.
- Secure the Roosts: Use sturdy brackets and wood screws to firmly attach the roosting bars to the back wall and the top of the brooder box. Ensure all parts are secure to support the weight of the roosting chickens.
- Finish the Coop: Once the structure is complete, you can add a layer of bedding to the brooder box and place a heat lamp inside. The elevated design helps keep the brooder area off the cold floor and protects the chicks from the rest of the flock.
10. A-Frame Ladder Roost with Nesting Boxes
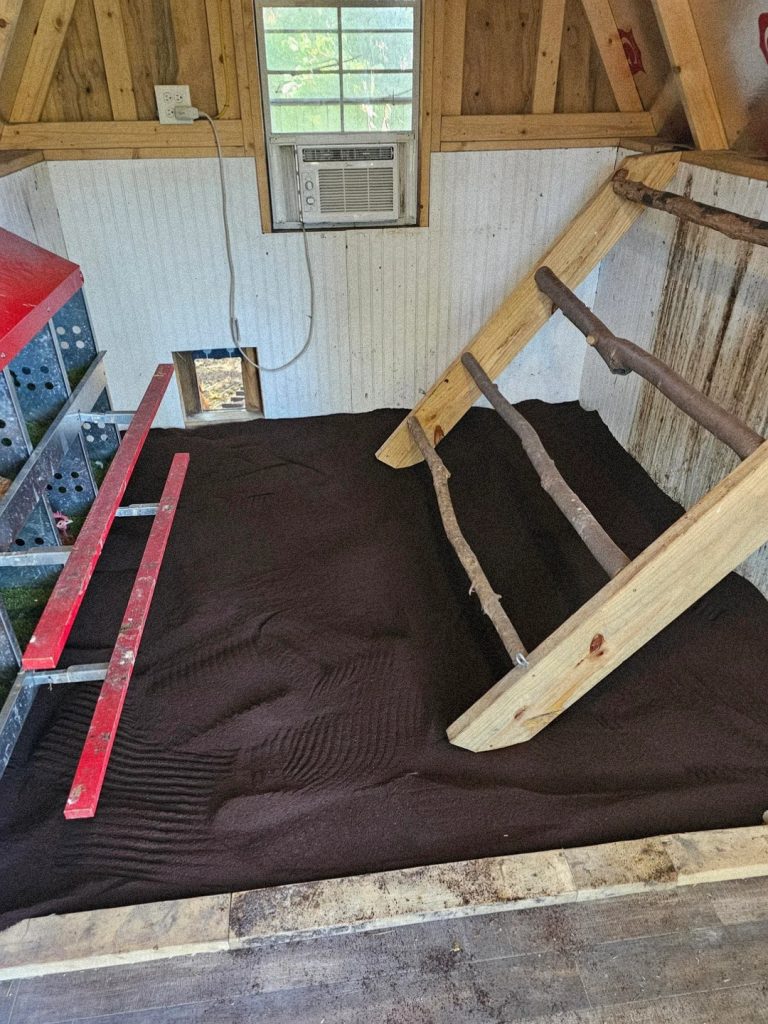
Image: https://www.reddit.com/user/Medical-Chipmunk-950/
What Makes It Unique
This final design combines a classic A-frame ladder roost with a separate, organized system of nesting boxes. The roost is made from a mix of natural branches and lumber, offering a variety of surfaces for your chickens’ feet. The A-frame structure is free-standing, which makes it easy to move for cleaning the coop. The nesting boxes are located separately, allowing you to customize their placement and keep the roosting area and nesting area distinct, which helps with hygiene and egg collection.
Materials Needed
- 2×4 lumber
- Tree branches
- Wood screws
- Saw
How to Do It
- Build the A-Frame Supports: Start by creating the two A-frame sides using 2×4 lumber. These should be cut to form an ‘A’ shape that is wide at the bottom and tapers to a point at the top. The angle should be gentle enough for chickens to easily climb.
- Attach the Roosting Bars: Cut a mix of 2x4s and natural tree branches to the same length. Secure them horizontally between the two A-frame supports. You can alternate between the smooth lumber and the natural branches to provide different textures for the chickens’ feet.
- Position the A-Frame: Place the finished roosting ladder against a wall in the coop. The free-standing design makes it easy to adjust its position as needed.
- Install the Nesting Boxes: On the opposite side of the coop, you can install nesting boxes. You can use pre-made boxes or build your own out of plywood. Secure them to the wall at a comfortable height for your hens. Having the nesting boxes separate from the main roosting area helps keep them clean and encourages hens to lay their eggs in a dedicated space.