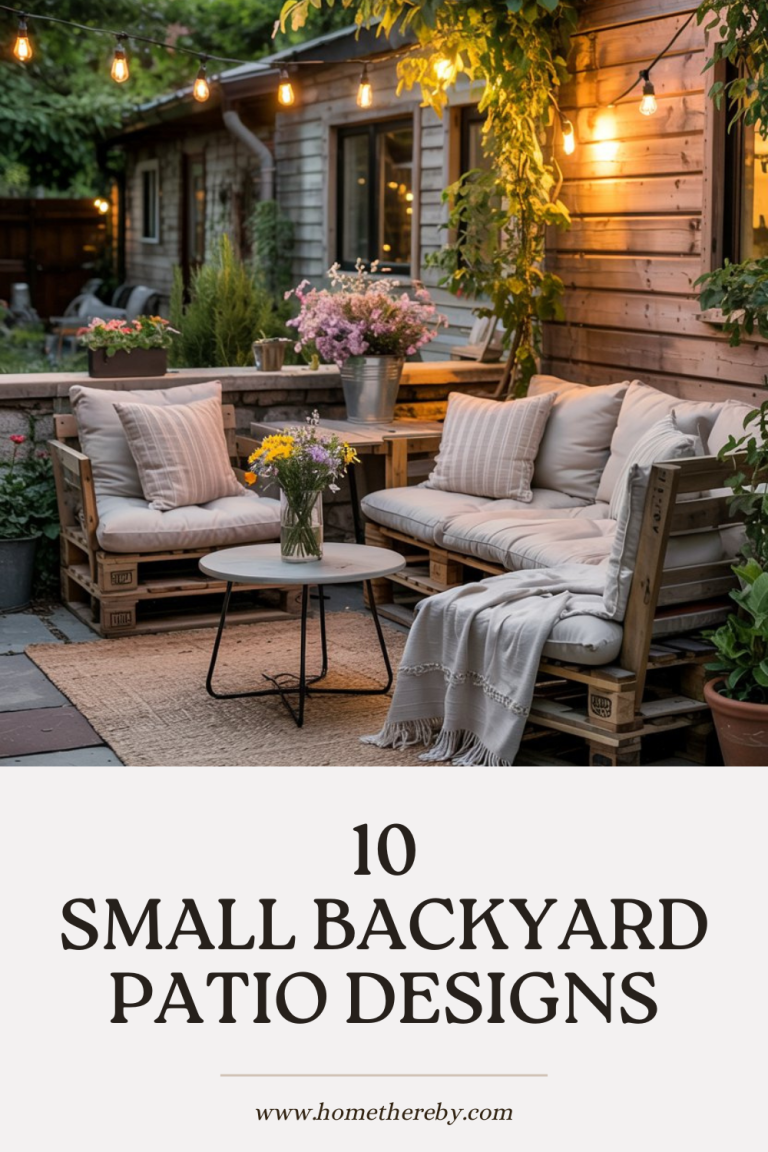
10 Backyard Patio Design Ideas on a Budget
We all dream of having a cozy backyard patio where we can sip morning coffee, host BBQ nights, or just escape the chaos of the day. But when you see the price tags on fancy outdoor furniture and landscaping, it feels impossible.
The good news? Creating a stylish patio doesn’t have to drain your savings. With a little creativity (and some clever hacks), you can transform your backyard into a stunning retreat, without spending thousands.
These 10 patio design ideas will spark your creativity while keeping your wallet happy.
Backyard Patio Designs Ideas in Budget
1. The DIY Pallet Patio
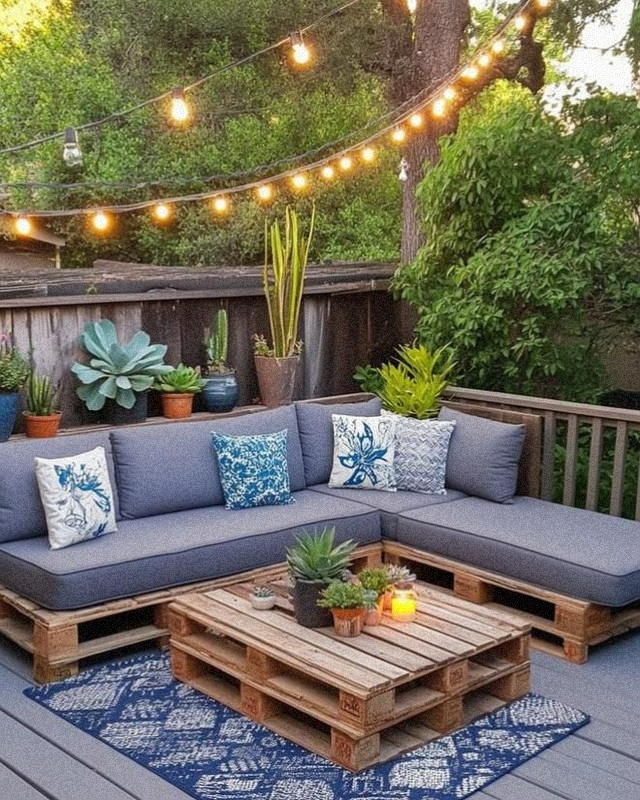
Image: https://www.instagram.com/lovely.harbor/
What Makes It Unique
This idea stands out because it’s a sustainable and budget-friendly approach to backyard design. By repurposing materials, you reduce waste and can create a truly one-of-a-kind look. It combines rustic charm with modern comfort, making it a versatile option for various aesthetics.
Materials Needed
- Wooden pallets
- Sandpaper or a power sander
- Outdoor-safe paint or wood stain
- Large foam cushions and throw pillows
- Screws and a drill
- Optional: Casters
How to Do It
- Gather and Prepare the Pallets: Source your pallets from local businesses or online marketplaces. Clean them and sand down any rough spots.
- Paint or Stain the Wood: Apply a coat of paint or stain to give your furniture a uniform and weather-resistant finish. Allow it to dry completely.
- Assemble the Furniture:
- For the Seating: Stack two pallets on top of each other to create the base for the seating. Attach them securely with screws. You can arrange them in an “L” shape or a straight line to fit your space.
- For the Coffee Table: Stack two or three pallets and screw them together to create a sturdy table. You can add casters to the bottom if you want it to be mobile.
- Add the Cushions and Decor: Place the foam cushions on the pallet bases. This is where you can have fun with color and texture. Add your throw pillows, potted plants (like succulents), and string lights to complete the look.
2. The Deck & Paver Combo
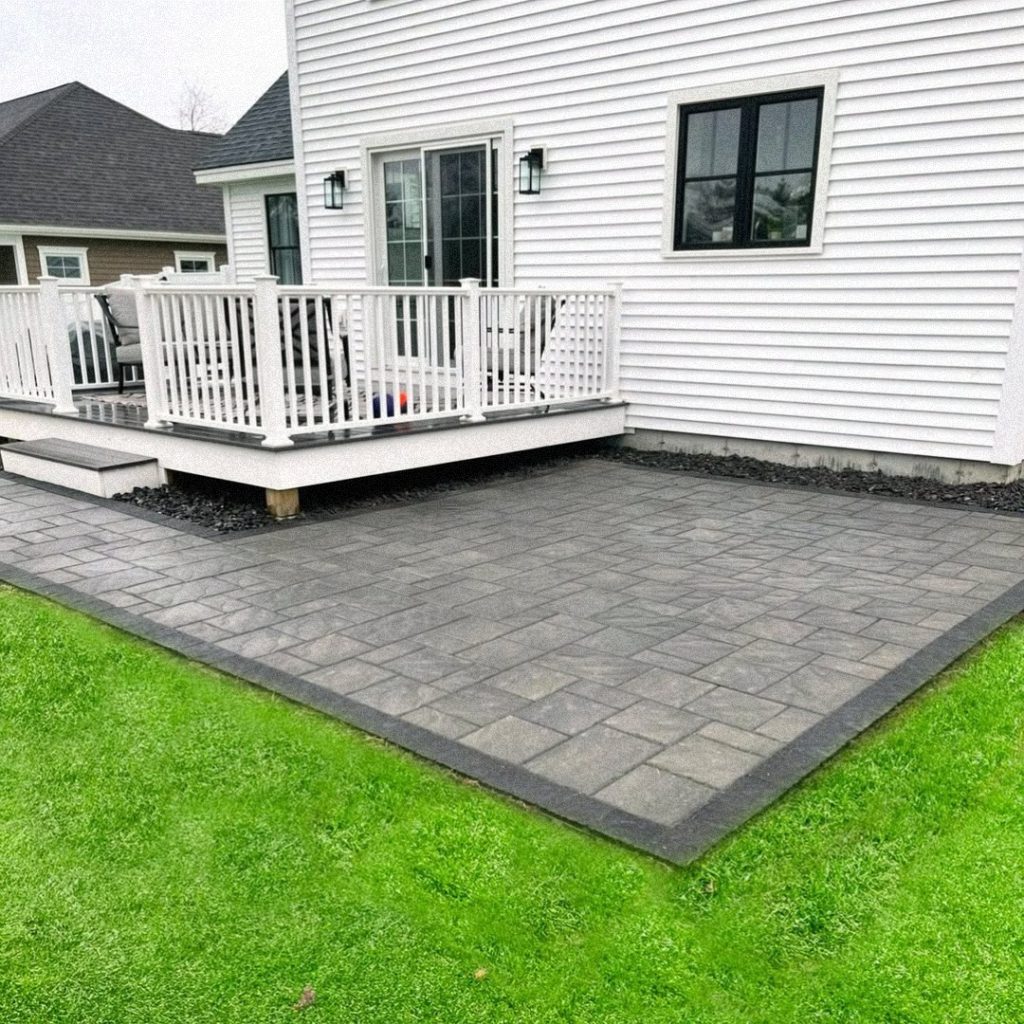
Image: https://www.instagram.com/thestoneguyrob/
What Makes It Unique
This patio is highly unique due to its ability to create distinct “rooms” in a single backyard area. The combination of a raised deck and a ground-level patio adds depth and architectural interest, breaking up a flat landscape. It is also an excellent solution for yards with a slight slope, as the deck can be built on the higher ground, connecting seamlessly to the lower patio.
Materials Needed
- Pavers
- Paver sand
- Gravel or crushed stone
- Edging material
- Decking lumber
- Deck screws or nails
- Deck railing kit
- Concrete footings
How to Do It
- Plan the Layout: Start by measuring your space and deciding on the size and shape of both the deck and the paver patio. Mark the areas on the ground.
- Install the Patio: Excavate the area for the patio to the appropriate depth. Lay a base of gravel or crushed stone and compact it thoroughly. Spread a layer of paver sand and then lay your pavers in the chosen pattern. Install the edging to secure the perimeter.
- Build the Deck: Dig holes for the deck footings and pour concrete to create a stable foundation. Construct the deck frame and attach the decking boards.
- Add the Finishing Touches: Build and install the deck railing. Ensure the steps from the deck to the patio are secure and well-designed. You can then add furniture, plants, and other decor to personalize each of the new zones.
3. The Raised Stone Patio with Steps
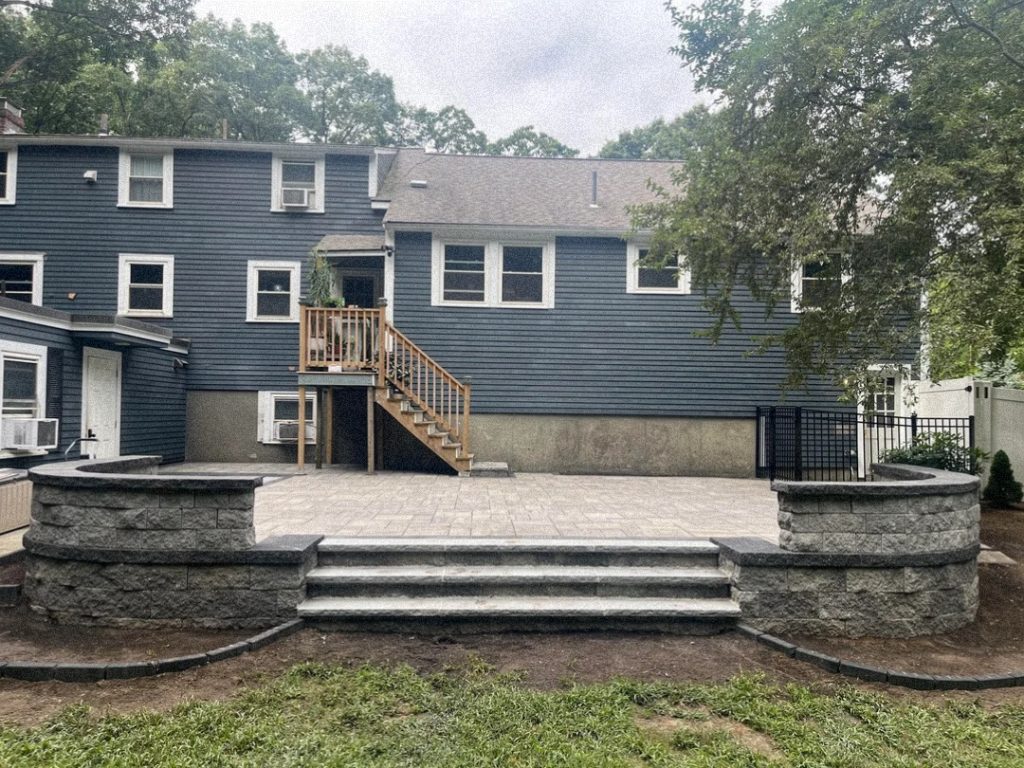
Image: https://www.reddit.com/user/eazyfields/
What Makes It Unique
What sets this idea apart is its structured, multi-level design. By building a raised patio, you can transform a sloped or uneven yard into a functional and beautiful area. The use of retaining walls not only serves a practical purpose but also creates a sense of enclosure and permanence, making it feel like a comfortable outdoor space. The built-in steps provide a seamless transition from the lower yard to the elevated patio.
Materials Needed
- Retaining wall blocks
- Paver stones
- Paver and wall stone adhesive
- Base material (gravel or crushed stone)
- Paver sand
- Edging material
- Landscaping fabric
- Leveling tools
How to Do It
- Excavation: Prepare the site by excavating the area for both the patio base and the retaining wall footing.
- Build the Retaining Wall: Lay a solid, level foundation for the wall. Stack the retaining wall blocks in a staggered pattern, using adhesive between the layers to secure them. Build the walls and integrate the steps, ensuring they are sturdy and level.
- Install the Patio Base: Backfill the area within the retaining walls with your base material (gravel or crushed stone) and compact it thoroughly. Lay landscaping fabric over the base.
- Lay the Pavers: Add a layer of paver sand and screed it to a uniform depth. Carefully lay the paver stones on the sand, tapping them into place with a rubber mallet.
- Finishing: Use a compactor to set the pavers. Sweep paver sand into the joints to lock them in place. This will provide stability and prevent shifting.
4. The Cozy Courtyard Oasis
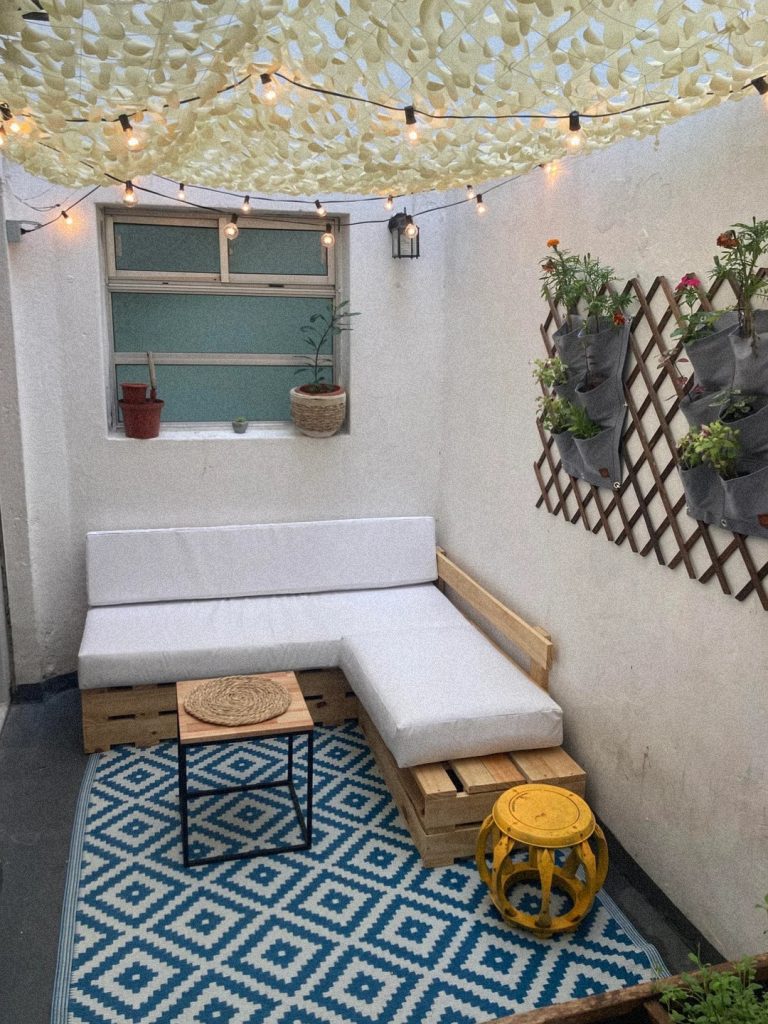
Image: Reddit.com
What Makes It Unique
This design stands out for its clever use of a small space. Building a custom sofa from repurposed materials maximizes the available seating area. The addition of a sunshade and string lights creates a cozy, private atmosphere, while the vertical garden adds a touch of nature without cluttering the limited floor space. This is a highly adaptable and personalizable idea that is both budget-friendly and charming.
Materials Needed
- Wooden crates or pallets
- Outdoor-safe paint or wood stain
- Large foam cushions with covers
- Outdoor rug
- String lights
- Sunshade or canopy fabric
- Vertical garden planter and plants
- Screws and a drill
How to Do It
- Arrange the Crates: Position the wooden crates or pallets to create the base of your corner sofa. Secure them together with screws to make a sturdy frame.
- Prepare the Wood: Sand the crates to remove any rough edges. Apply a coat of outdoor-safe paint or stain to protect the wood from moisture.
- Add Comfort and Style: Lay the foam cushions on top of the crate base. Roll out your outdoor rug to add a pop of color and define the seating area.
- Enhance the Space: Install a sunshade or canopy overhead to provide relief from the sun. String lights around the perimeter for a warm glow in the evening. Attach a vertical garden to a free wall to bring in plants and flowers without sacrificing valuable floor space.
5. The Sunken Stone Fire Pit
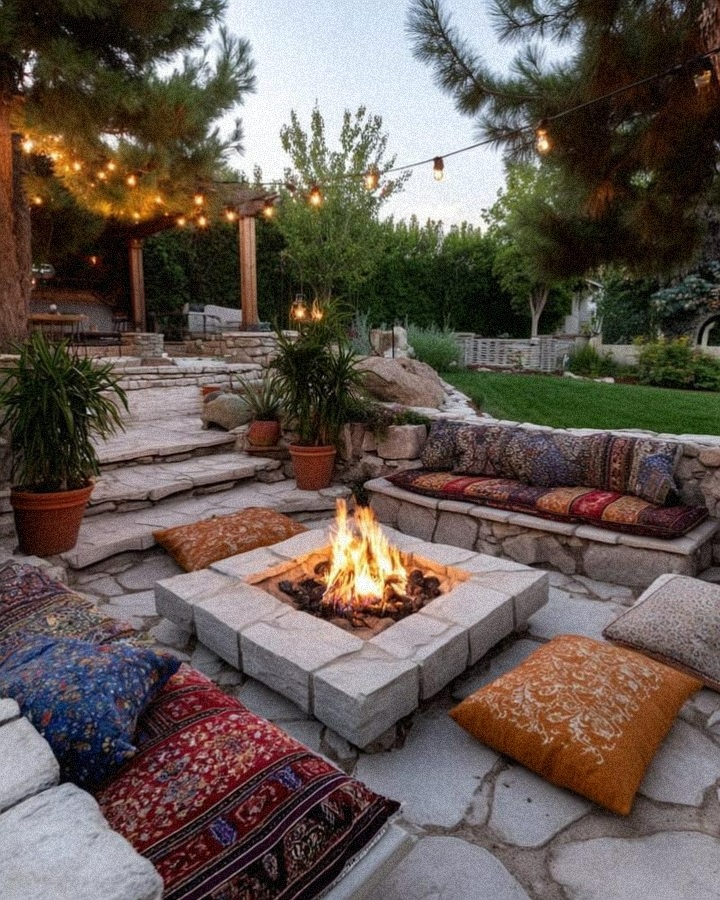
Image: https://www.instagram.com/lovely.harbor/
What Makes It Unique
This design stands out by integrating the seating and fire pit directly into the patio itself. The built-in stone benches not only save money on furniture but also create a cohesive and high-end feel. The use of natural stone gives the space an organic, timeless beauty, and the lowered, intimate setting makes the fire pit a true centerpiece. It’s an ideal choice for creating a dedicated entertaining zone that feels both structured and relaxed.
Materials Needed
- Natural stone pavers or flagstone
- Retaining wall blocks
- Mortar or sand
- Fire pit stones or bricks
- Fire pit insert (optional)
- Base material (gravel or crushed stone)
- Outdoor cushions and pillows
- String lights
How to Do It
- Excavate and Prepare the Base: Dig out the area for the patio and fire pit. Lay down and compact a deep base of gravel or crushed stone to ensure a stable foundation.
- Construct the Fire Pit: Build the fire pit using fire-rated stones or blocks, securing them with mortar. Ensure the inner part of the pit is lined with fireproof material.
- Build the Seating: Create the seating area by stacking stone blocks to form a low wall or bench. Use mortar or a landscape adhesive to secure the blocks.
- Lay the Patio: Start laying the flagstones or pavers, working outward from the fire pit. Fill the gaps between the stones with sand or mortar for a solid surface.
- Finish with Decor: Place your comfortable cushions and pillows on the stone benches. Drape string lights overhead to create a magical, warm glow for evening ambiance.
6. The Circular Paver Fire Pit Patio
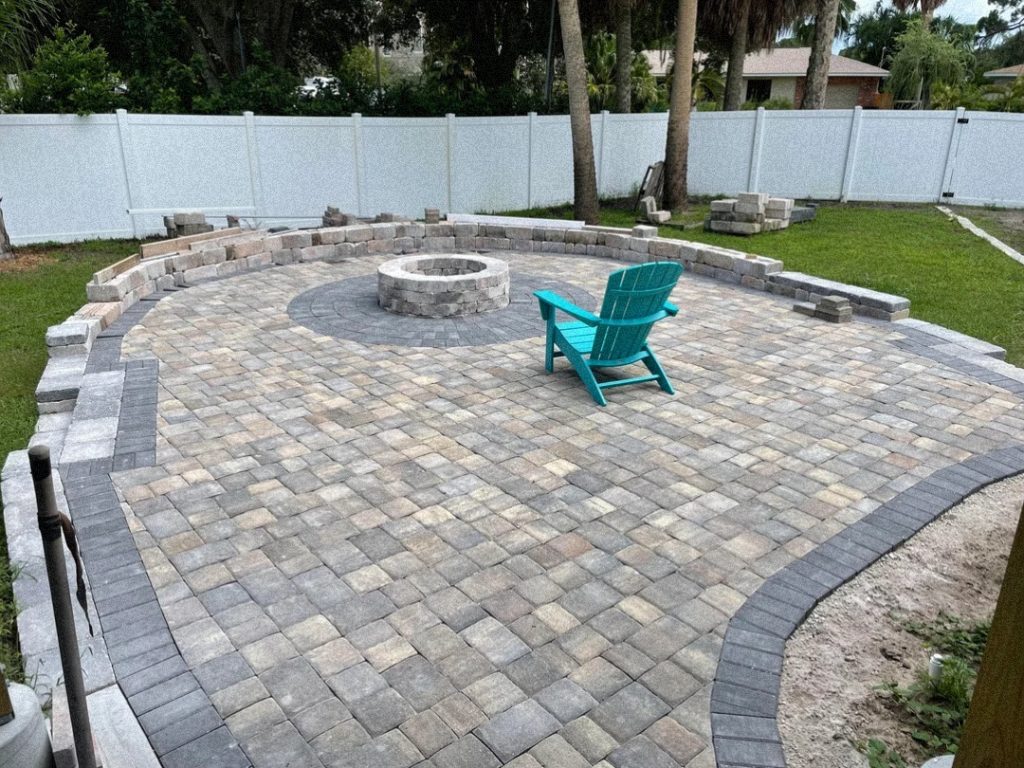
Image: https://www.reddit.com/user/Goldenhead17/
What Makes It Unique
This patio has a distinctive circular shape and the contrasting paver patterns used to define the central fire pit area. The border pavers also help frame the space beautifully. The design creates a natural gathering spot, making it an ideal choice for socializing and enjoying evenings outdoors. Its robust construction with pavers ensures durability and low maintenance, while offering ample space for various furniture arrangements beyond just a single chair.
Materials Needed
- Concrete pavers (multiple colors for contrast)
- Fire pit kit or fire-rated retaining wall blocks
- Paver sand
- Base material (gravel or crushed stone)
- Edging material
- Polymeric sand
- Landscaping fabric
How to Do It
- Plan and Excavate: Mark out your desired circular shape. Excavate the area to the proper depth, ensuring a slight slope for drainage.
- Lay the Base: Install landscaping fabric, then add a thick layer of gravel or crushed stone and compact it thoroughly.
- Build the Fire Pit: Assemble your fire pit kit or build the fire pit structure using fire-rated retaining wall blocks in the center of your marked circle.
- Lay the Pavers: Begin laying the pavers, starting from the fire pit and working outwards in concentric circles or your chosen pattern. Use contrasting pavers for the border and the area immediately around the fire pit for visual interest.
- Secure and Finish: Install edging around the perimeter of the patio to hold the pavers in place. Sweep polymeric sand into the joints between the pavers and then wet it according to the manufacturer’s instructions to lock everything in place.
- Furniture and Ambiance: Once complete, arrange comfortable outdoor chairs or benches around the fire pit. Consider adding string lights, potted plants, or small side tables to enhance the usability and aesthetics of your new circular patio.
7. The Raised Paver Patio
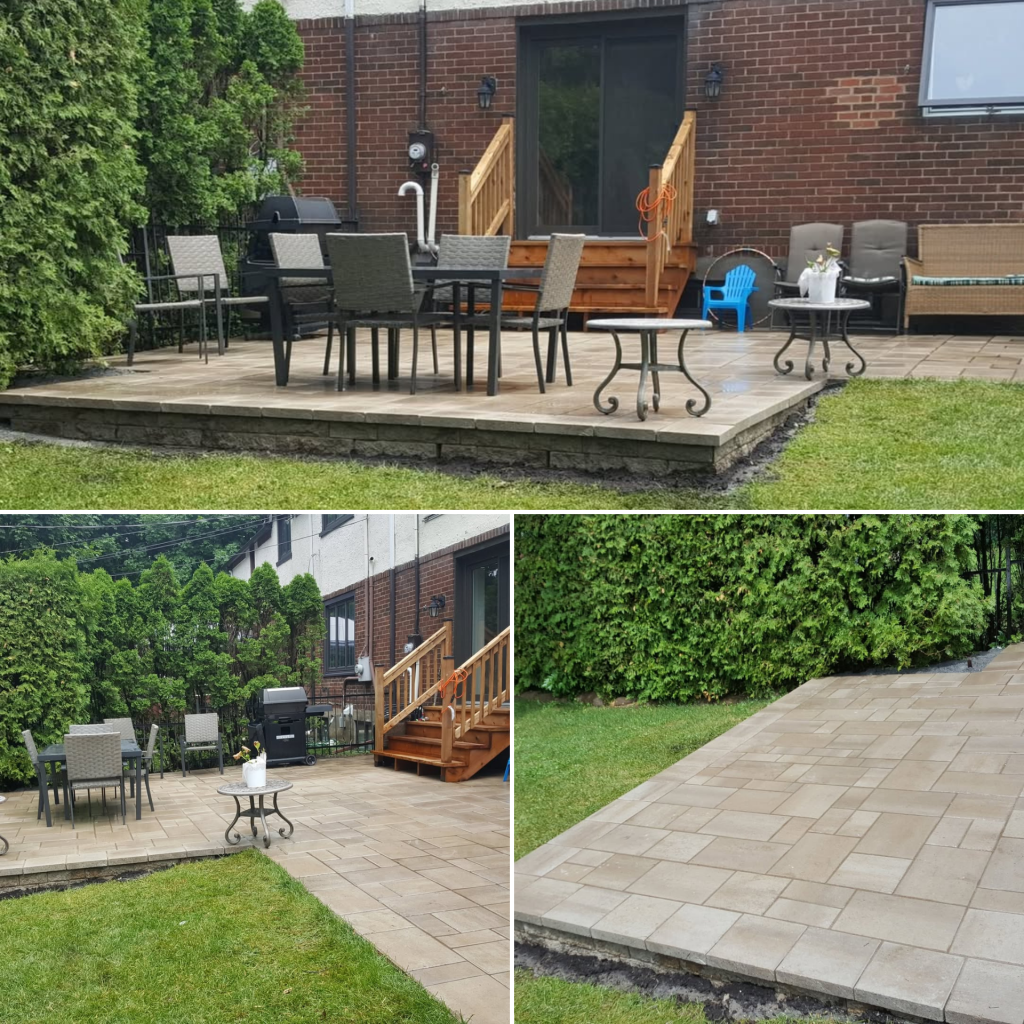
Image: https://www.instagram.com/dixeslandscaping/
What Makes It Unique
What makes this patio stand out is its defined and structured appearance. The raised platform not only adds a modern, sophisticated look but also provides a distinct visual boundary between the patio and the lawn. This separation helps keep the patio cleaner and can improve drainage away from the house. Its straightforward, rectangular shape is easy to lay out and provides a versatile surface for any type of outdoor furniture.
Materials Needed
- Concrete Pavers
- Retaining Wall Blocks
- Paver Sand
- Base Material (Gravel Or Crushed Stone)
- Landscape Adhesive
- Edging Material
- Landscaping Fabric
How to Do It
- Prepare the Area: Mark out the rectangular shape of your patio. Excavate the area to the correct depth to account for the gravel base, sand layer, and the pavers themselves.
- Build the Retaining Wall: Lay the first course of retaining wall blocks directly on the ground, ensuring it’s level. Use landscape adhesive to stack the subsequent courses, building the low wall that will define the patio’s edge.
- Lay the Base: Inside the walls, lay down landscaping fabric, followed by a thick layer of gravel or crushed stone. Compact this material thoroughly to create a stable foundation.
- Install the Pavers: Spread an even layer of paver sand over the base. Start laying your pavers, working from one corner and moving across the patio. Tap them into place with a rubber mallet.
- Finish the Surface: Once all the pavers are in place, sweep polymeric sand into the joints. Use a hose to lightly mist the surface, activating the sand to harden and lock the pavers together.
8. The Multi-Tone Paver Patio
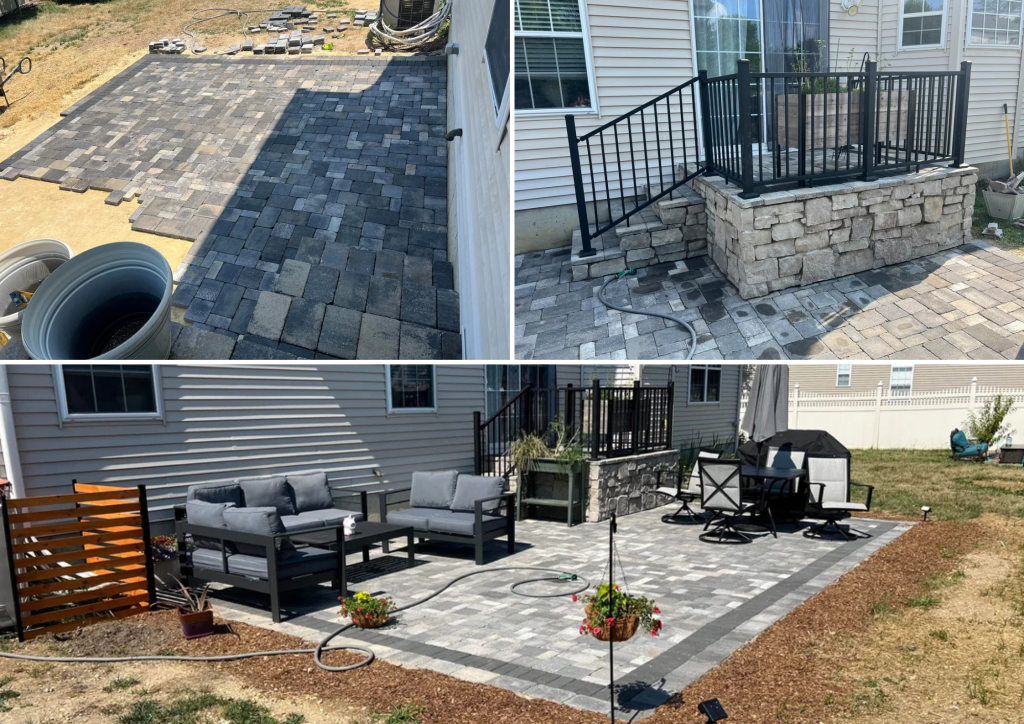
Image: https://www.reddit.com/user/streeter555/
What Makes It Unique
This patio has contrasting pavers. The dark outer border beautifully frames the lighter, multi-toned interior, making the space feel more defined and visually appealing. The design also shows how to seamlessly connect the patio to your home by building a small, elevated stone landing and steps, creating a natural flow from indoors to outdoors.
Materials Needed
- Pavers In Two Contrasting Colors
- Retaining Wall Blocks Or Stone Veneer
- Paver Sand
- Base Material (Gravel Or Crushed Stone)
- Polymeric Sand
- Landscape Fabric
- Mulch
How to Do It
- Prepare the Ground: Begin by excavating the area to a depth that accommodates the base, sand, and pavers. Ensure the area slopes slightly away from the house for proper drainage.
- Build the Steps: Construct the steps and any small raised landings using retaining wall blocks. This will create a solid transition from your home’s door to the new patio.
- Lay the Base: Once the area is prepped, lay down landscape fabric to prevent weed growth. Cover the fabric with a thick layer of gravel or crushed stone and compact it firmly.
- Lay the Pavers: Spread an even layer of paver sand over the compacted base. Start by laying the contrasting border pavers first, then fill in the main area with the inner-color pavers, working outward from the house.
- Finish the Surface: Sweep polymeric sand into the joints and activate it with water according to the instructions. Finish the space by adding mulch around the patio’s edges to soften the transition to the lawn.
9. The Simple Gravel Patio
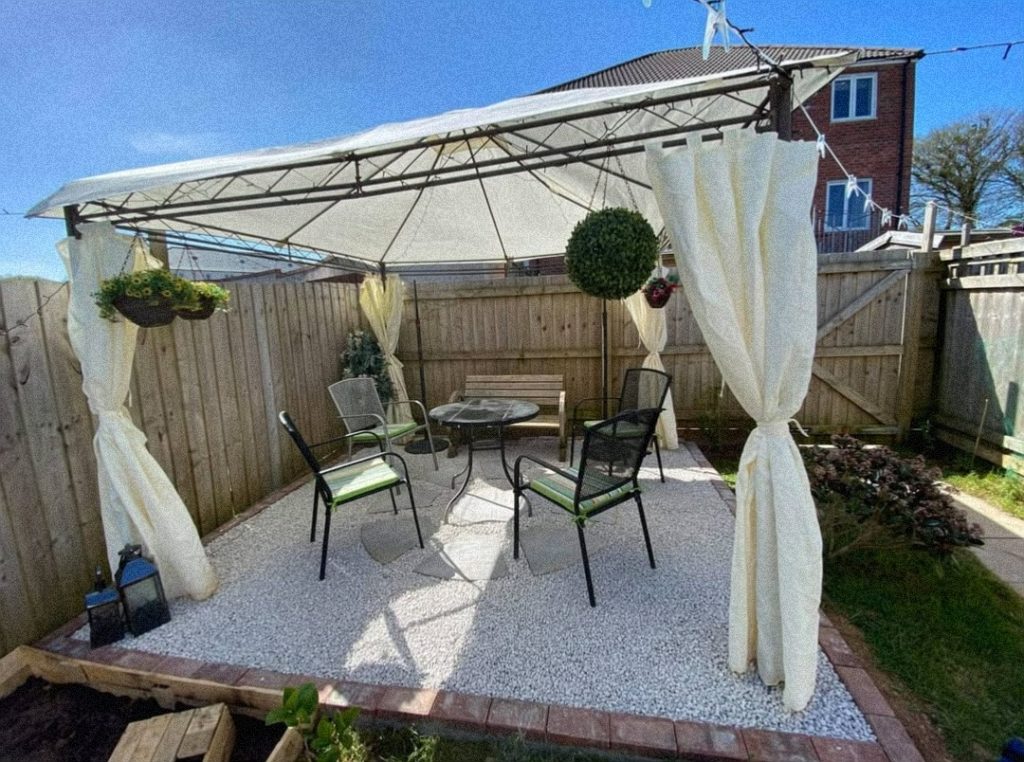
Image: https://www.instagram.com/haideecambrook/
What Makes It Unique
This patio stands out for its simplicity and quick installation. The gravel surface is a low-cost alternative to pavers or concrete, and it’s much easier to install. The temporary nature of the gazebo and curtains allows you to customize and change the look of your space with minimal effort. This design is perfect for renters or anyone looking for a fast, effective, and budget-friendly patio solution that can be set up in a single weekend.
Materials Needed
- Gravel Or Decorative Stones
- Bricks Or Pavers
- Landscape Fabric
- Metal Gazebo Or Canopy Kit
- Outdoor Furniture
- Outdoor Curtains (Optional)
How to Do It
- Prepare the Space: Mark out the size and shape of your patio. Excavate the area to a shallow depth, just enough to contain the gravel.
- Lay the Border: Create a clean edge by laying a single row of bricks or pavers around the perimeter of the excavated area.
- Install the Base: Cover the entire base with a layer of landscape fabric. This will prevent weeds from growing up through the gravel.
- Add the Gravel: Pour the gravel or decorative stones into the prepared area and rake it to create a smooth, even surface.
- Assemble and Decorate: Assemble your metal gazebo and place it over the gravel. Arrange your furniture, hang the optional curtains, and add plants and other decor to create a welcoming atmosphere.
10. The Deck-Turned-Lounge
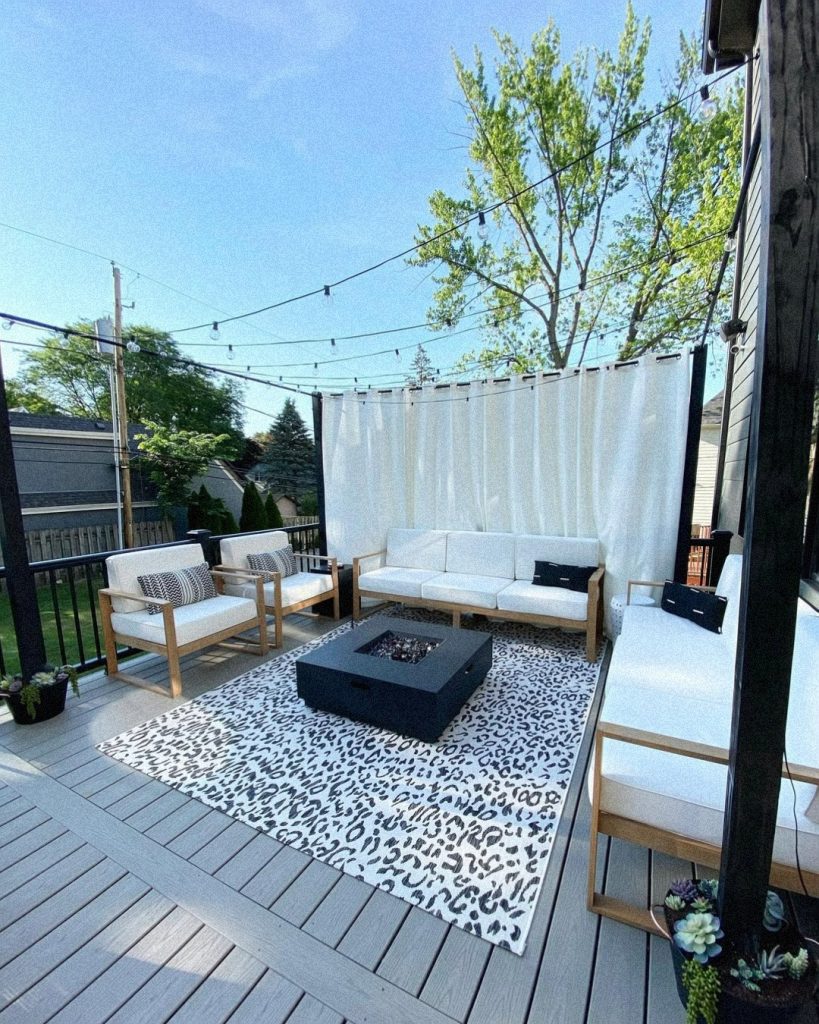
Image: https://www.instagram.com/laurenelizabethburke/
What Makes It Unique
This patio idea is unique for its focus on a layered design approach. It uses key elements like an area rug, a fire pit, string lights, and curtains to define and soften the space. All these are making it feel more like an indoor room. This technique works especially well on existing decks or patios, proving you don’t need a major construction project to completely refresh your outdoor area.
Materials Needed
- Outdoor Lounge Furniture Set
- Outdoor Area Rug
- Portable Fire Pit
- String Lights
- Outdoor Curtains
- Planter Posts or Posts For Hanging Curtains
- Potted Plants
How to Do It
- Start With the Furniture: Place a comfortable lounge set, like a sofa and chairs, at the center of your deck. This will be the main seating area.
- Add the Rug: Lay a weather-resistant outdoor rug underneath the furniture. This instantly defines the space and adds texture and pattern.
- Install the Fire Pit: Place a portable fire pit in the middle of the rug to create a central focal point for your new lounge area.
- Create the Ambiance: String outdoor lights overhead to provide a warm glow for evening use. Attach curtains to planter posts or a pergola structure to add privacy and a soft, elegant touch.
- Finish With Plants: Place a few potted plants, like succulents or ferns, around the perimeter to bring in natural elements and complete the look.