8 Chicken Coop Interior Ideas: Easy Cleaning & Care
If you’ve ever groaned at the thought of cleaning your chicken coop, you’re not alone. I used to dread the smell, the mess, and the time it took. But after making a few smart changes to the inside of my coop, the difference was night and day. Suddenly, cleaning became faster, easier, and way less stressful.
These 8 interior ideas will help you do the same, and your chickens will thank you for it.
Chicken Coop Interior Ideas
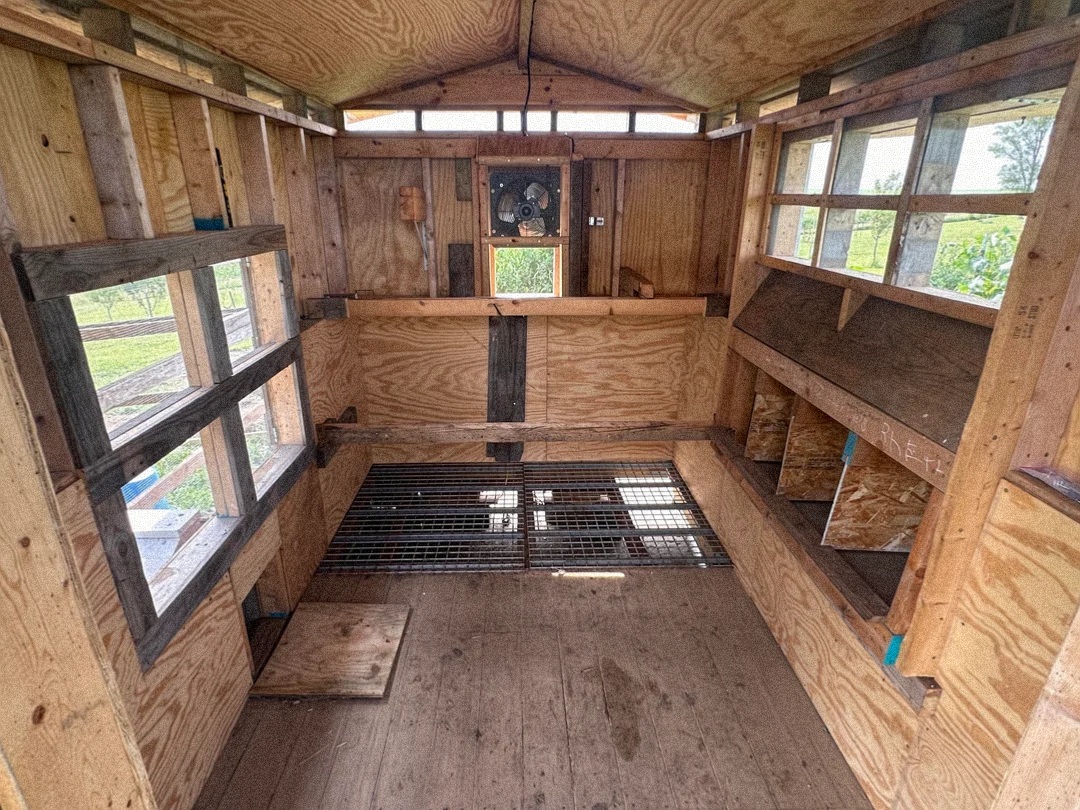
Image: https://www.reddit.com/user/Rj475475/
1. The Elevated Roost with Integrated Waste Management
What Makes It Unique
This chicken coop design is unique because it combines an elevated roosting bar with a slatted or wire-mesh floor directly beneath it. This setup efficiently separates the chickens from their droppings, which fall through the mesh to a collection area below. This keeps the main floor clean, reduces the build-up of waste, and significantly improves sanitation and hygiene within the coop.
Materials Needed
- Lumber (2x4s or similar for framing)
- Wire mesh or plastic slatted flooring
- Screws or nails
- Tape measure
- Saw
- Drill
- Optional: A removable tray for waste collection
How To Do It
- Frame the Roosting Area: Build a raised platform using 2x4s or similar lumber, positioned high enough for the chickens to roost comfortably off the ground.
- Install the Mesh Floor: Secure a durable, rust-proof wire mesh or plastic slatted flooring directly under the roosting bar. The mesh size should be small enough to be safe for the chickens’ feet, but large enough for droppings to fall through easily.
- Create a Collection Tray: Construct or place a removable tray (like a deep litter tray or a simple plastic sheet) beneath the mesh floor to catch the droppings. This tray can be easily pulled out for cleaning.
- Install Roosting Bars: Place rounded or flattened roosting bars on top of the framed platform, above the wire mesh. Ensure the bars are wide enough for the chickens to grip without foot strain.
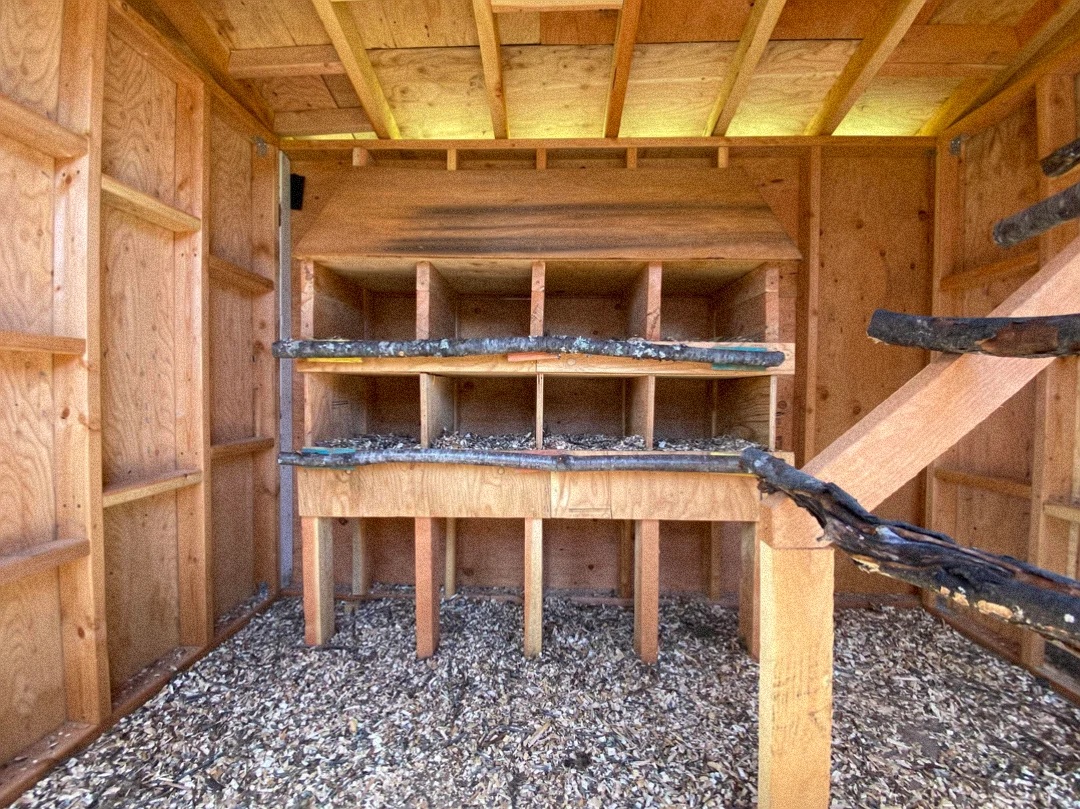
Image: https://www.reddit.com/user/Responsible-Cod812/
2. Multi-Level Roosting with Natural Branches and Deep Litter
What Makes It Unique
This design uses natural tree branches for roosting, creating an organic and stimulating environment that mimics a chicken’s natural habitat. The use of multiple levels maximizes vertical space, allowing more chickens to roost comfortably while promoting natural pecking order dynamics. The deep litter method on the floor reduces the need for frequent clean-outs and helps to create a healthy, self-sustaining coop ecosystem.
Materials Needed
- Natural tree branches (untreated and sturdy)
- Screws, nails, or brackets for mounting
- Saw and drill
- Pine shavings, wood chips, or straw for the deep litter
- Rake or pitchfork for turning the litter
How To Do It
- Source Natural Branches: Find sturdy, untreated tree branches that are a good size for chickens to grip. Ensure they are free of pests and rot.
- Mount Roosting Bars: Securely attach the branches at different heights using screws, brackets, or by notching them into the coop’s frame. Make sure they are stable and can support the weight of multiple chickens.
- Prepare the Deep Litter Bed: Start by spreading a thick layer of carbon-rich material like pine shavings, wood chips, or straw across the entire coop floor.
- Manage the Litter: Add new layers of bedding as the top layer becomes soiled. The chickens will scratch and mix the droppings into the litter, where beneficial microbes will break down the waste. Stir the litter occasionally to aerate it and prevent compaction.
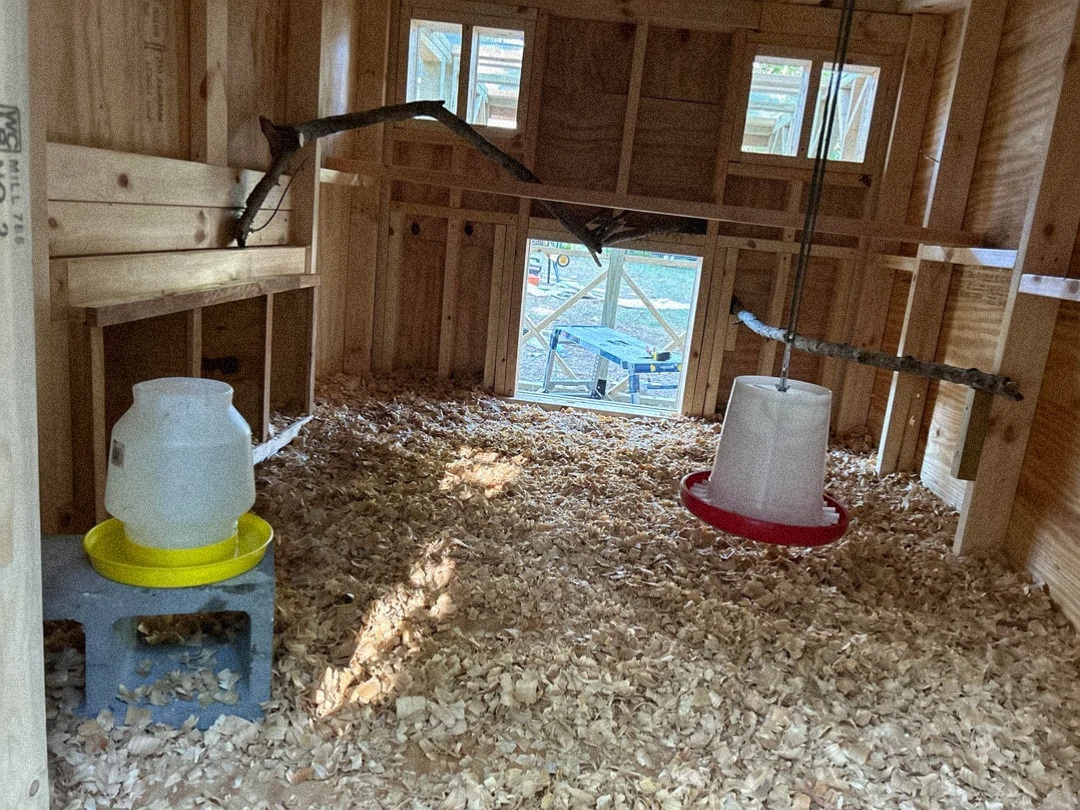
Image: https://www.reddit.com/user/No-Carpenter-7472/
3. Integrated Nest Boxes with Natural Accents and Deep Litter
What Makes It Unique
This coop design features a built-in nesting box structure that is elevated and compartmentalized, providing privacy and safety for hens laying eggs. The use of natural wood and simple construction gives the coop a rustic and authentic feel. The deep litter bedding on the floor complements the design by maintaining a healthy and low-maintenance environment for the flock.
Materials Needed
- Plywood or lumber for the nest box structure
- Screws or nails
- Saw and measuring tape
- Roosting bar (lumber or natural branch)
- Bedding for the nest boxes (straw, pine shavings, etc.)
- Deep litter material for the floor (wood chips, pine shavings, etc.)
- Optional: Natural branches for roosting and decorative accents
How To Do it
- Build the Nest Box Frame: Construct a sturdy, elevated frame for the nesting boxes using plywood or lumber. The height should be comfortable for hens to access, but high enough to keep the boxes clean from floor traffic.
- Create Individual Compartments: Use plywood dividers to create multiple separate compartments within the frame. A good rule of thumb is one nesting box for every 3-4 hens.
- Add a Roosting Bar: Install a roosting bar or a natural branch in front of the nest boxes to provide a landing spot for the chickens.
- Fill with Bedding: Add clean bedding material like straw, pine shavings, or shredded paper to each nesting compartment to provide a comfortable and clean place for the hens to lay.
- Set up the Deep Litter Floor: Spread a thick layer of carbon-rich material (pine shavings, wood chips, or straw) on the coop floor to absorb moisture and start the composting process.
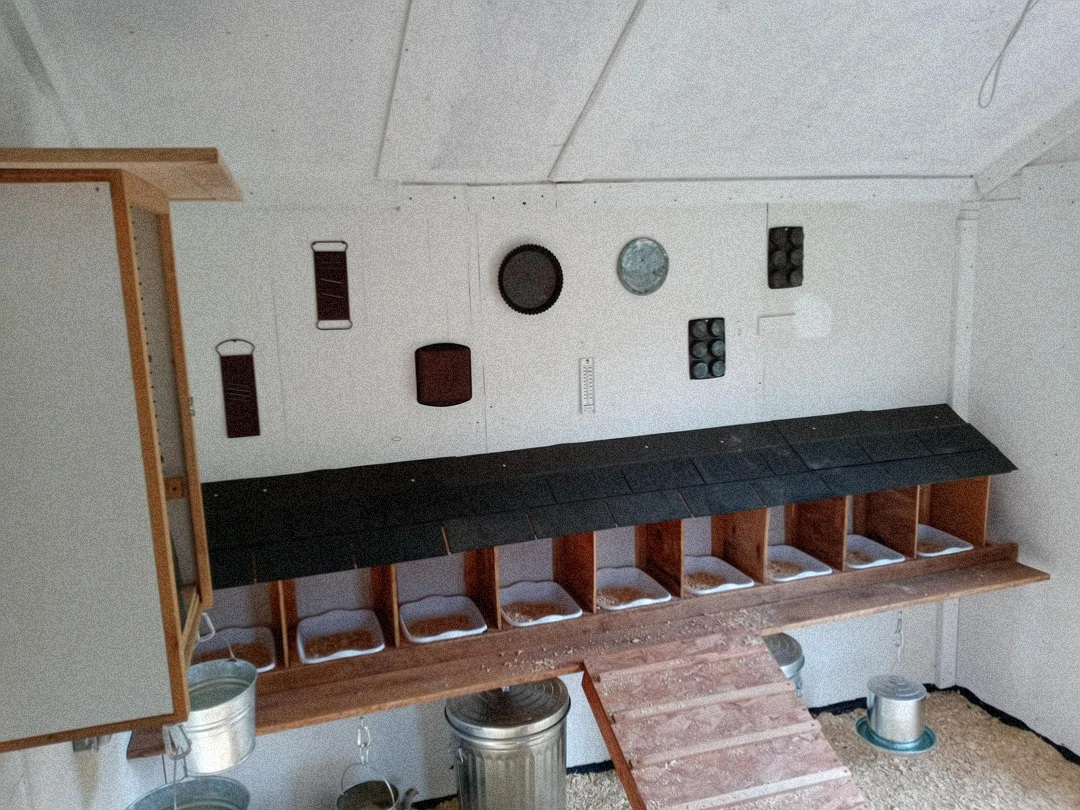
Image: https://www.reddit.com/user/SaSKingD/
4. Modular Nest Boxes with External Accessibility
What Makes It Unique
This coop design features a sleek, modular nesting box system with a slanted, shingled roof that directs droppings away from the egg-laying area. The most unique feature is the likely external access, allowing for easy egg collection without needing to enter the coop. The clean, painted walls and various mounted objects also create a modern and organized aesthetic.
Materials Needed
- Plywood or lumber for the frame and dividers
- Roofing shingles or other waterproof material for the roof
- Screws or nails
- Saw and measuring tape
- Hinges for external access (optional)
- Bedding for the nests (pine shavings, straw)
How To Do It
- Construct the Frame: Build a long, elevated frame for the nesting boxes from plywood or lumber, ensuring it’s wide enough for a chicken to turn around comfortably.
- Install Dividers: Use vertical plywood dividers to create individual nesting compartments.
- Build the Roof: Create a sloped roof for the nest boxes using plywood and cover it with a protective material like roofing shingles. This roof serves as both a perch for chickens and a way to keep droppings from accumulating in the nesting boxes.
- Add External Access (Optional): If building for external access, make the back of the nest boxes a hinged door that can be opened from outside the coop for easy egg collection.
- Place Bedding: Fill each compartment with a comfortable and clean bedding material like pine shavings or straw.
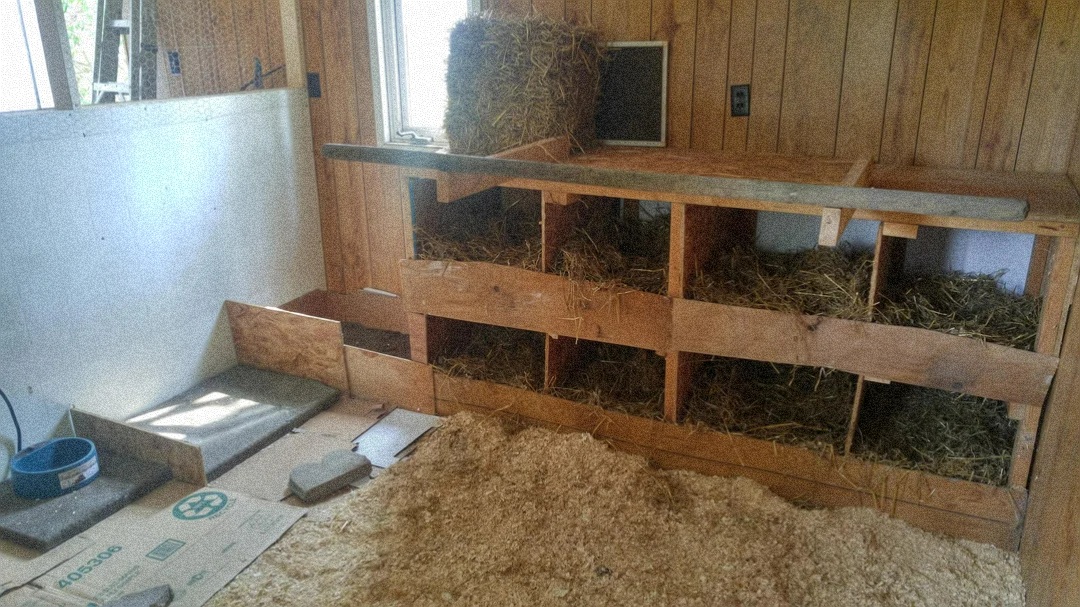
Image: https://www.reddit.com/user/Idontevenknow0k/
5. Tiered Nesting Boxes with Integrated Ramps and Hay Bedding
What Makes It Unique
This coop design utilizes a tiered, multi-level nesting box system that provides ample space for a large flock. The unique feature is the integrated ramp system on the side, which allows chickens to easily access the upper and lower tiers without crowding. The use of large bales of hay as both bedding and a structural element highlights a cost-effective and practical approach to coop management.
Materials Needed
- Untreated lumber for the frame and ramps
- Plywood for dividers
- Screws or nails
- Saw and measuring tape
- Hay or straw for nest bedding and as a structural element
- Wood shavings or other deep litter material
- Optional: A bale of hay for bulk bedding and a natural aesthetic
How To Do It
- Build the Multi-Level Frame: Construct a sturdy, two-tiered frame from untreated lumber. The bottom tier can rest on the floor, while the upper tier is built on top of it, creating a “bunk bed” style for the nests.
- Create Compartments: Use plywood or lumber to build dividers for the individual nesting compartments on both levels.
- Install Ramps: Build a wide, sturdy ramp on the side of the nest box structure, allowing chickens easy access to the top level.
- Fill with Hay: Place large, loose bales of hay or straw inside each nesting compartment. This provides a soft, warm, and natural-smelling bed for the hens.
- Use Deep Litter on the Floor: Spread a layer of wood shavings or other deep litter material on the coop floor to manage waste and reduce maintenance.
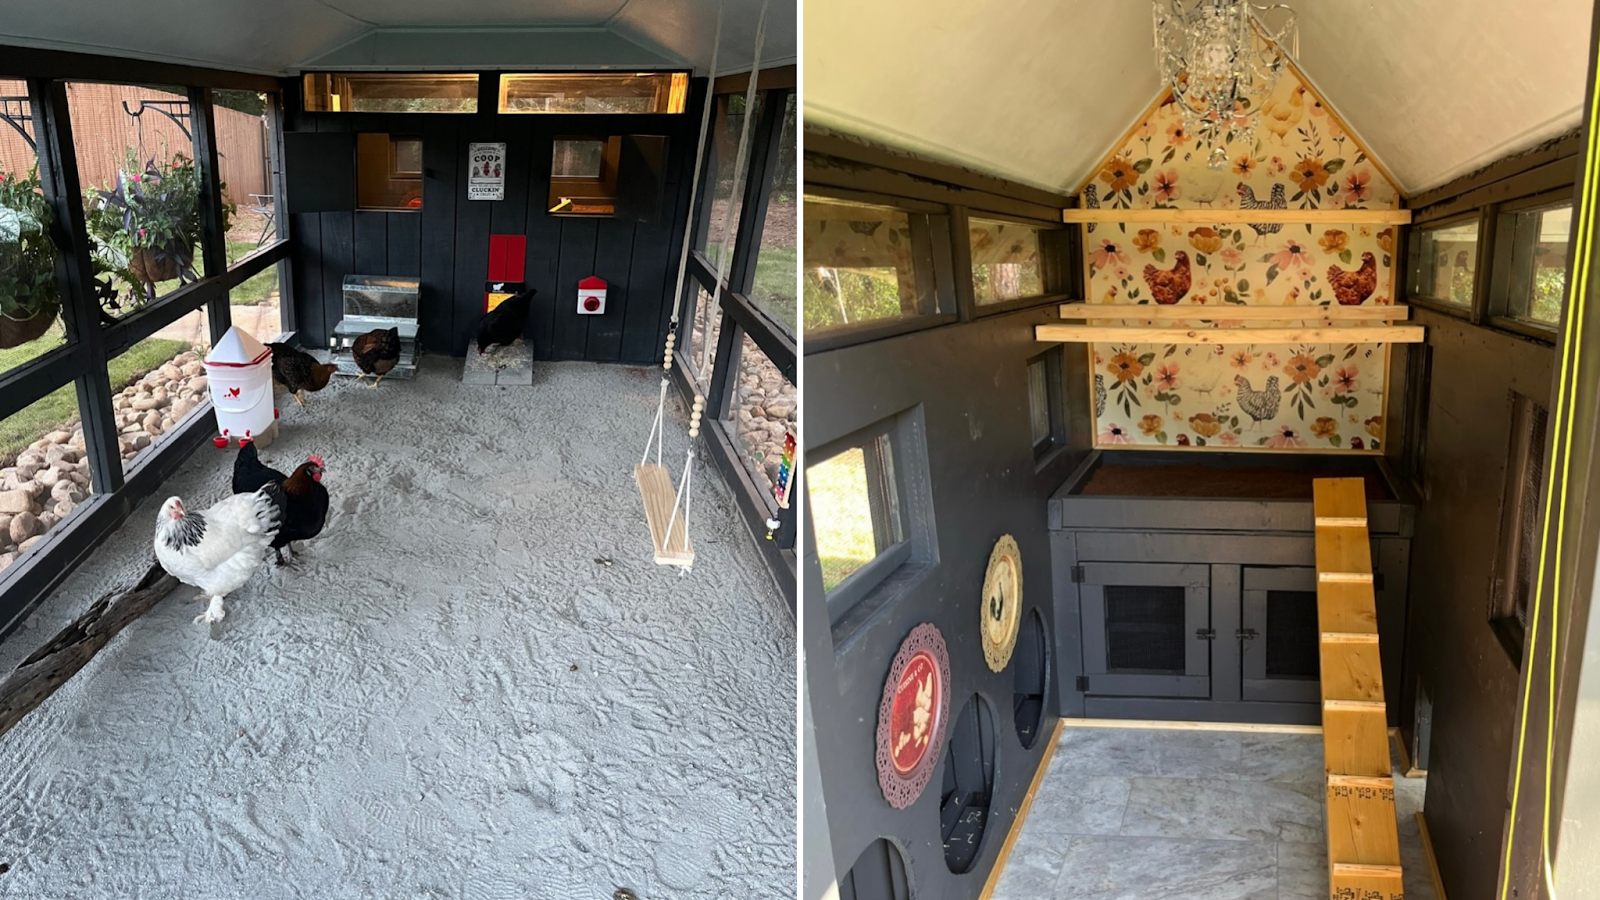
Image: https://www.instagram.com/bee.jeweled.coop
6. Luxury Cottage-Style Chicken Coop
What Makes It Unique
This coop is unique for its modern and aesthetic design, moving beyond a simple functional structure to a stylish habitat that complements the owner’s outdoor space. Key features include a painted interior/exterior, a spacious, covered run with sand bedding, and a decorative interior wall with chicken-themed wallpaper. A miniature swing and a chandelier add whimsical and luxurious elements.
Materials Needed
- Lumber (treated for outdoor use)
- Exterior and interior paint (non-toxic)
- Predator-proof wire mesh
- Wallpaper or decorative paint
- A small swing and hanging hardware
- A chandelier or decorative light fixture
- Construction-grade sand
- Plywood or lumber for the roosting platform and ramp
- Nesting box materials
- Basic carpentry tools (saw, drill, tape measure)
How To Do It
- Plan the Layout: Design a coop with a separate enclosed sleeping/nesting area and an attached, covered run. This design is ideal for keeping the flock safe from predators while providing them with a spacious outdoor area.
- Build the Structure: Construct the coop and run frame using treated wood. Enclose the run with predator-proof wire mesh.
- Paint and Decorate: Paint the coop’s exterior and interior with a durable, non-toxic paint. Use wallpaper or decorative paint to create a feature wall inside the coop.
- Install Roosts and Nest Boxes: Build a raised roosting area and install a ramp for access. Place nesting boxes in a quiet, low-traffic area of the coop.
- Add Special Touches: Hang a small swing from the ceiling of the run. Install a small, chicken-safe chandelier or other decorative lighting inside the coop.
- Use Sand for the Run Floor: Fill the run with a thick layer of construction-grade sand. This material is easy to clean, drains well, and helps to keep pests away.
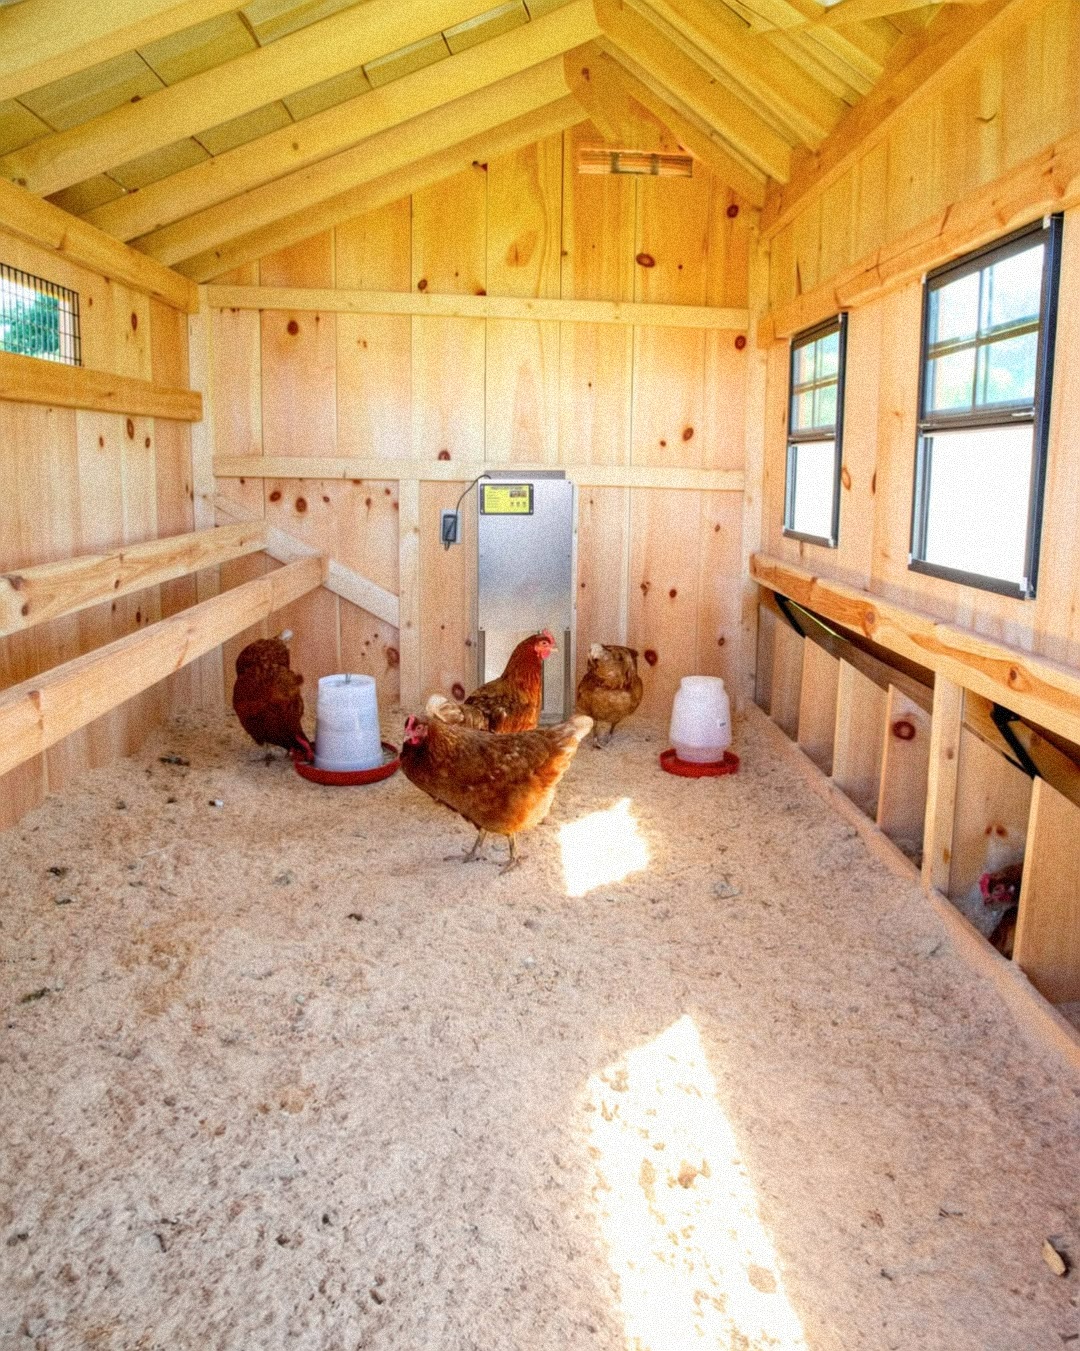
Image: https://www.instagram.com/thehenhousecollection
7. Functional Coop with Automated Features and Integrated Nesting
What Makes It Unique
This chicken coop design prioritizes cleanliness, functionality, and ease of management. Its most unique feature is the apparent integration of an automatic chicken door, which simplifies daily routines for the owner and provides consistent security for the flock. The coop also features a clean, well-lit interior, deep sand bedding for easy cleaning, and built-in, accessible nesting boxes.
Materials Needed
- Lumber for the coop frame and walls
- Plywood or other material for the roof and nesting boxes
- Windows for light and ventilation
- Automatic chicken door kit
- Construction-grade sand for bedding
- Hanging feeders and waterers
- Basic carpentry tools (saw, drill, tape measure, level)
- Screws or nails
How To Do It
- Construct a Well-Ventilated Structure: Build a sturdy coop with ample windows for light and cross-ventilation. Ensure the roof has good overhangs to protect from the elements.
- Install an Automatic Chicken Door: Integrate an automatic chicken door into one of the walls. This device can be set on a timer or light sensor to open and close, allowing chickens access to their run while keeping them secure at night.
- Use Sand for Bedding: Lay down a deep layer of construction-grade sand on the coop floor. Sand is an excellent bedding choice as it drains well, is easy to sift and clean, and discourages pests.
- Build Integrated Nesting Boxes: Construct a row of simple, accessible nesting boxes along one wall. These can be open-fronted, with a small lip to keep bedding in. Ensure there’s a small perch in front for easy access.
- Provide Feeders and Waterers: Place hanging feeders and waterers to keep them off the floor and prevent contamination.

Image: https://www.instagram.com/tonealexander
8. Rustic Arched Coop with Faux-Stucco Finish
What Makes It Unique
This coop design is distinguished by its charming, rustic aesthetic achieved with a faux-stucco finish over a sculpted frame. The nesting boxes are built into an archway structure, giving the coop a unique, almost Mediterranean feel. The natural, unpainted wood ceiling with exposed beams contrasts beautifully with the white walls, and a decorative chandelier adds a touch of elegance.
Materials Needed
- Lumber for the coop frame
- Plywood or other material for the nest box frame
- Chicken wire or plaster lathe
- Stucco, plaster, or cement mix for the walls
- Natural wood planks for the ceiling
- A decorative chandelier or light fixture
- Straw or hay for bedding
- Basic carpentry and masonry tools (trowel, saw, drill, tape measure)
How To Do It
- Frame the Coop Structure: Build the basic coop frame from lumber, ensuring a solid foundation.
- Build the Arched Nest Box Wall: Use plywood or a similar material to create a frame for the arched nesting boxes. You can use curved cuts to create the arch shapes.
- Apply the Faux-Stucco: Cover the framed nest box wall and other interior walls with a material like chicken wire or plaster lathe, then apply a layer of plaster, cement, or a stucco-like product. Sculpt the material to create the desired arched openings and a smooth, finished look.
- Install the Ceiling and Lighting: The ceiling is made of natural wood planks. Install a decorative light fixture like a chandelier to add a unique, personalized touch.
- Add Bedding: Use a deep layer of straw or hay on the coop floor and in the nest boxes to create a soft, warm, and natural environment.